
TM 9-2330-384-14&P
4-72. PRECHECK SYSTEM MAINTENANCE (Con't).
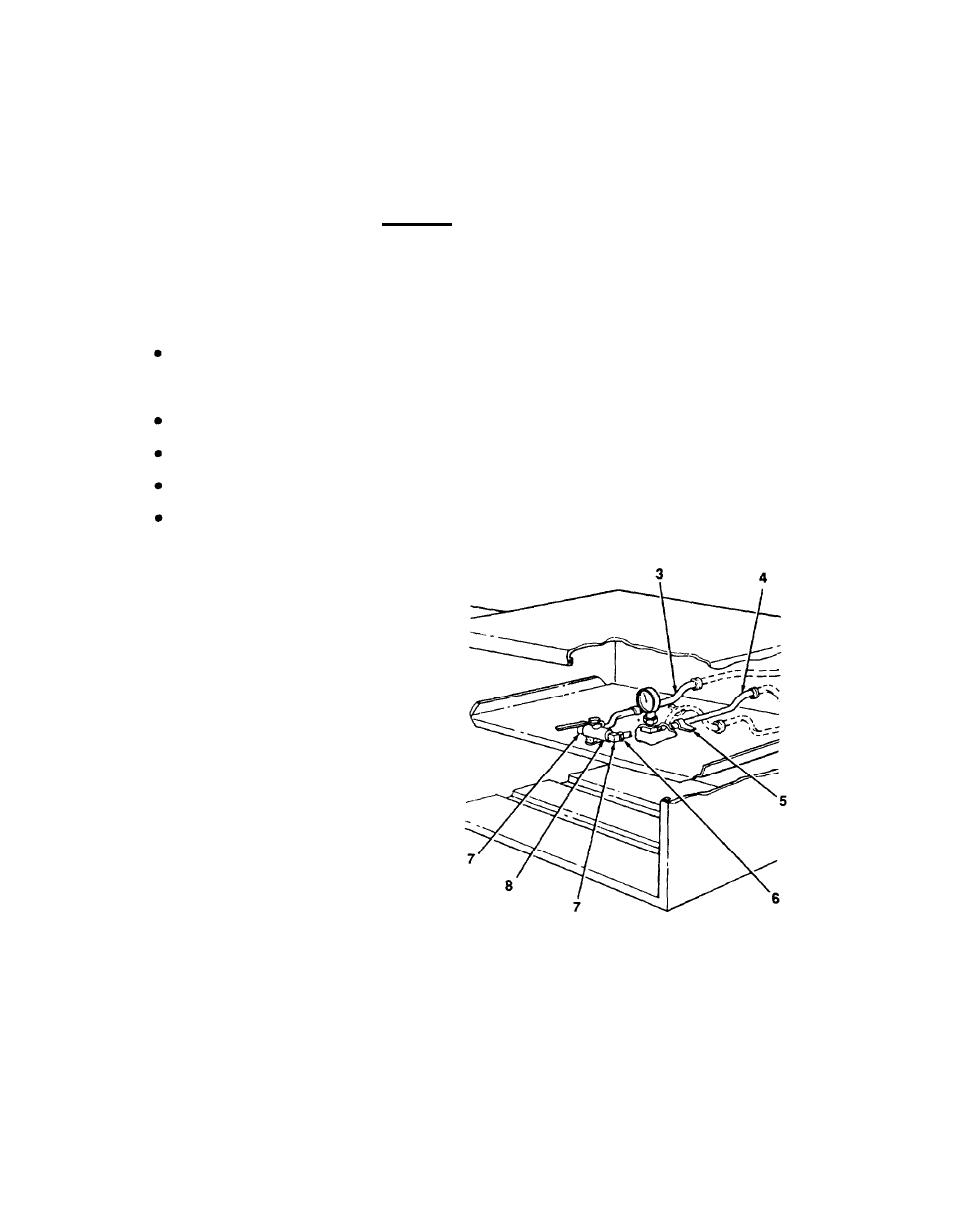
g. REMOVAL OF PRECHECK TUBING
CAUTION
Use caution when releasing tubing from under clips (5). Tubing should be
lifted gently and only enough to release tubing. improper handling of clips
will cause them to break.
NOTE
A suitable drain pan should be used to catch any draining fuel as tubing
lengths are disconnected. Dispose of any drained fuel in accordance
with local policy. Ensure that any spilled fuel is wiped up.
To remove tubing (3), perform steps 1 through 8.
To remove tubing (4), perform steps 9 through 16.
To remove tubing (14), perform steps 17 through 24.
To remove tubing (21), perform steps 25 through 27.
(1) Loosen nut (29) and disconnect
tubing (3) from straight adapter
(28).
(2) Inside cabinet (11), loosen nut
(6) and disconnect tubing (3)
from elbow (7).
(3) Release tubing (3) from under
clip (5) on top of shelf inside cabi-
net (11).
NOTE
if tubing (3) is not damaged, it may be
reused if there is sufficient length af-
ter cut is made.
Cut tubing (3) as close to end in-
(4)
side cabinet (1 1) as possible.
Pull tubing (3) out through hole in
(5)
back of cabinet (11).
Remove precheck valve (8) from
(6)
mounting to shelf inside cabinet
(11) (see subparagraph a). Re-
move elbow (7) from precheck
valve. Discard elbow.
If tubing (3) is being replaced, remove straight adapter (28) from coupling (24) at tank floor
(7)
(23).
Inspect grommet (30) at back wall of cabinet (11). If damaged, remove and discard.
(8)
4-230

