
TM 9-3405-206-14 & P
ADJUSTING UPPER BLADE GUIDES AND BLADE SUPPORT BEARING
The upper blade guides and blade support bearings are adjusted
only after the blade is tensioned and tracking properly. To adjust
proceed as follows:
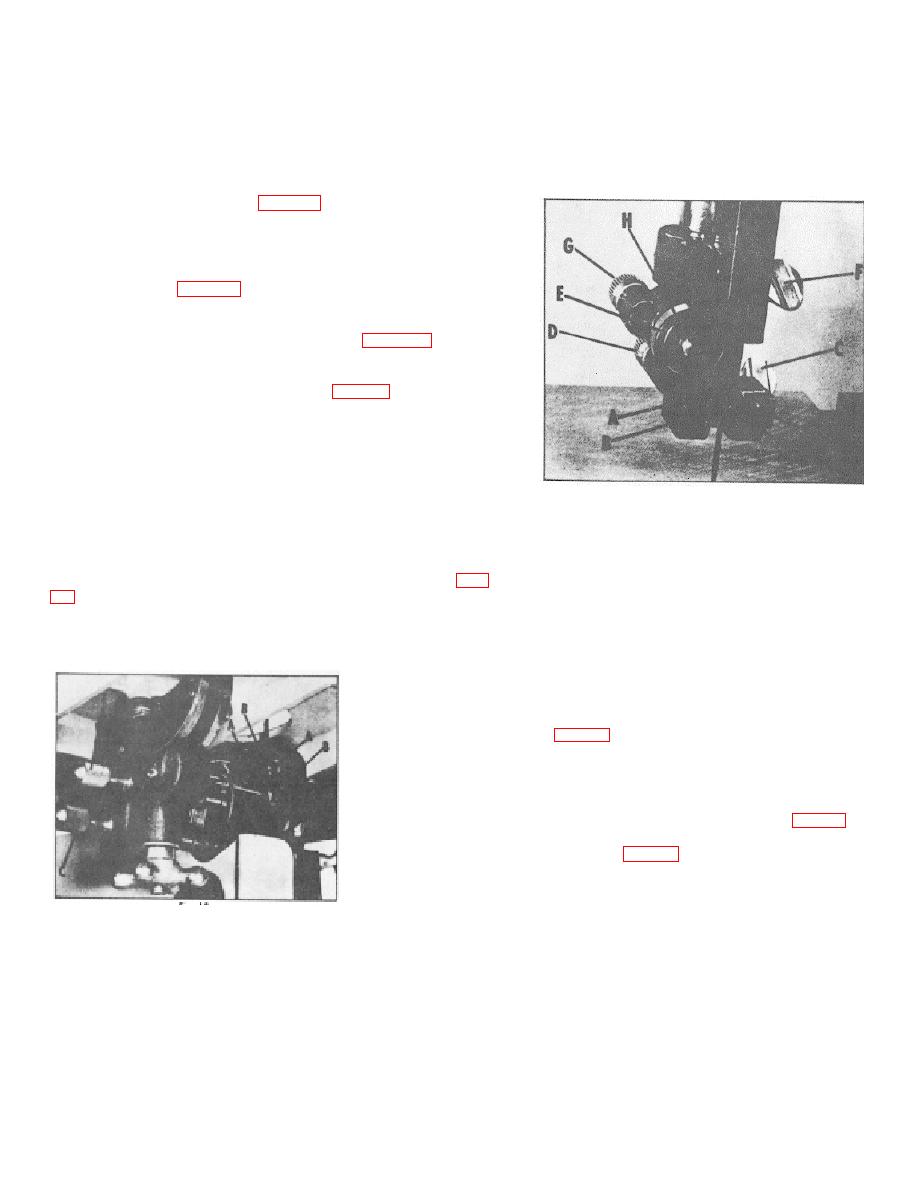
1. The upper blade guides (A) Fig. 17, are held in place by means of
the setscrews (B). Loosen the setscrews (B) to move the guides (A) as
close as possible to the side of the blade, being careful not to pinch the
blade. Then tighten the screws (B).
2. The guides (A) Fig. 17, should then be adjusted so that the front
edge of the guides are lust behind the gullets of the saw teeth. The
complete guide block bracket can be moved in or out by loosening
thumbscrew(C) and turning knurled knob (D) Fig. 17. When guides
(A) are set properly, tighten thumbscrew (C).
3. The upper blade support bearing (E) Fig. 17, prevents the blade
from being pushed too far to the back which could damage the set in
the saw teeth.
The support bearing (E) should be set 1 64" behind the blade by
loosening thumbscrew (F) and turning knurled knob (G) to move the
support bearing (E) in or out.
Fig. 17
4. The blade support bearing (L) should also be adjusted so the
back edge of the blade overlaps the outside diameter of the ball
bearing by about 1 16". The bearing (E) is set on an eccentric
and to change position remove screws (H) and bearing (E) Fig.
shaft that bearing (E) is attached to.
ADJUSTING LOWER BLADE GUIDES AND BLADE SUPPORT BEARING
The lower blade guides and blade support bearing should be adjusted at the
same time as the upper guides and bearing as follows:
1. Loosen the two screws (A) Fig. 18, and move the guides (B) as close as
possible to the side of the blade being careful not to pinch the blade. Then
tighten screws (A).
2. The front edge of the guide blocks (B) should be adjusted so they are just
behind the gullets of the saw teeth by turning the knurled knob (C) Fig. 18.
3. The lower blade support bearing (D) Fig. 18, should be adjusted so it is
about 1/64" behind the back of the blade by turning the knurled knob (E).
Fig. 18
CHANGING SPEEDS
This saw can be changed over instantly from a slow-speed metal cutting band saw to a standard high-
speed band saw for wood.
NEVER HAVE THE BAND SAW RUNNING WHEN CHARGING FROM METAL CUTTING TO WOOD
CUTTING OR VISE-VERSA.
13

