
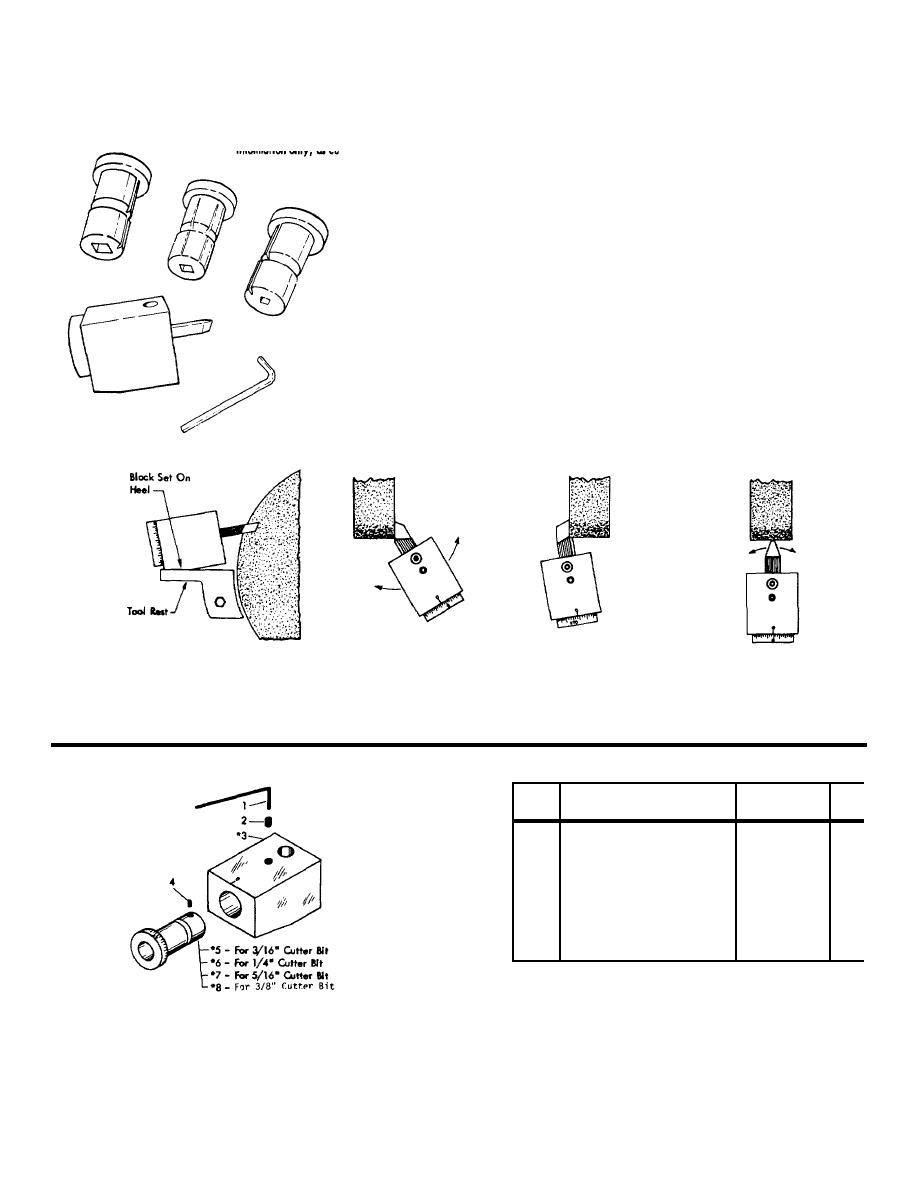
INSTRUCTIONS ON USE OF CUTTER BIT GRINDING BLOCK
Suggested CNUTT1ng Off Tool grinding angles a illustrated re given as general informaT1on only, m cutting off
tools CANNOT be ground In the Universal cutter Bit Grinding Block.
1.
cutter bit in proper sleeve and tighten securely, allowing
approximately of the cutter bit to protrude from the nose of the
sleeve.
2.
Place sleeve in block, set cutter bit to desired angle (graduations on
sleeve are In Increments of 50) and lock In position with set screw
on top of block. Reset for top and side clearance angles, if desired.
3.
Due to the many variations that enter into correct grinding angles
such as: cutting peed, type of finish and kind of material to be
macH1ned with cutter bit, no attempt has been made to show these
angles in the instructions, however, suggested clearances are
charted on the reverse side of this sheet. This is for the average
type of work and may not agree with the various other publicaT1ons
on cutter bit grinding.
Note: If tool rest on your grinder is not large
enough to accommodate cutter Bit Grinding
Block, clamp an auxiliary plate to extend the
tool rest.
1. Heel the block as shown for
2. Use both sides of wheel for
3. Use sides of wheel for grind-
4. Use face of wheel for grind-
grinding all clearances. Un-
grinding side clearances on
ing back and side rake.
ing radius, on round nose
less a small degree of front
all shapes of tools. Angle
Angle block to get proper top
tools, rotaT1ng the block to
clearance is required then
block to get proper shape.
back rake. Heel block if do-
develope the proper radius.
lay on flat of block.
sired.
Heel the block as shown in
Fig. 1.
Item
Part Name
Part No.
No.
1
Hex Wrench
173x6
2
Setscrew
149xS05
3
Block (2)
*AS4635-1
4
Setscrew
126x503
5
Sleeve (4) For
316" Bit *A5636
6
Sleeve (4) For
1/4" Bit *AS4637-1
7
Sleeve (4) For
5/16" Bit *AS4638-1
8
Sleeve (4) For
3/8" Bit *A54639-1
Available only as sub-assembly. Parts included are indicated by the
item numbers appearing in parenthesis after part name.
33

