
TM 9-4120-370-14
TO 35 E9-229-1
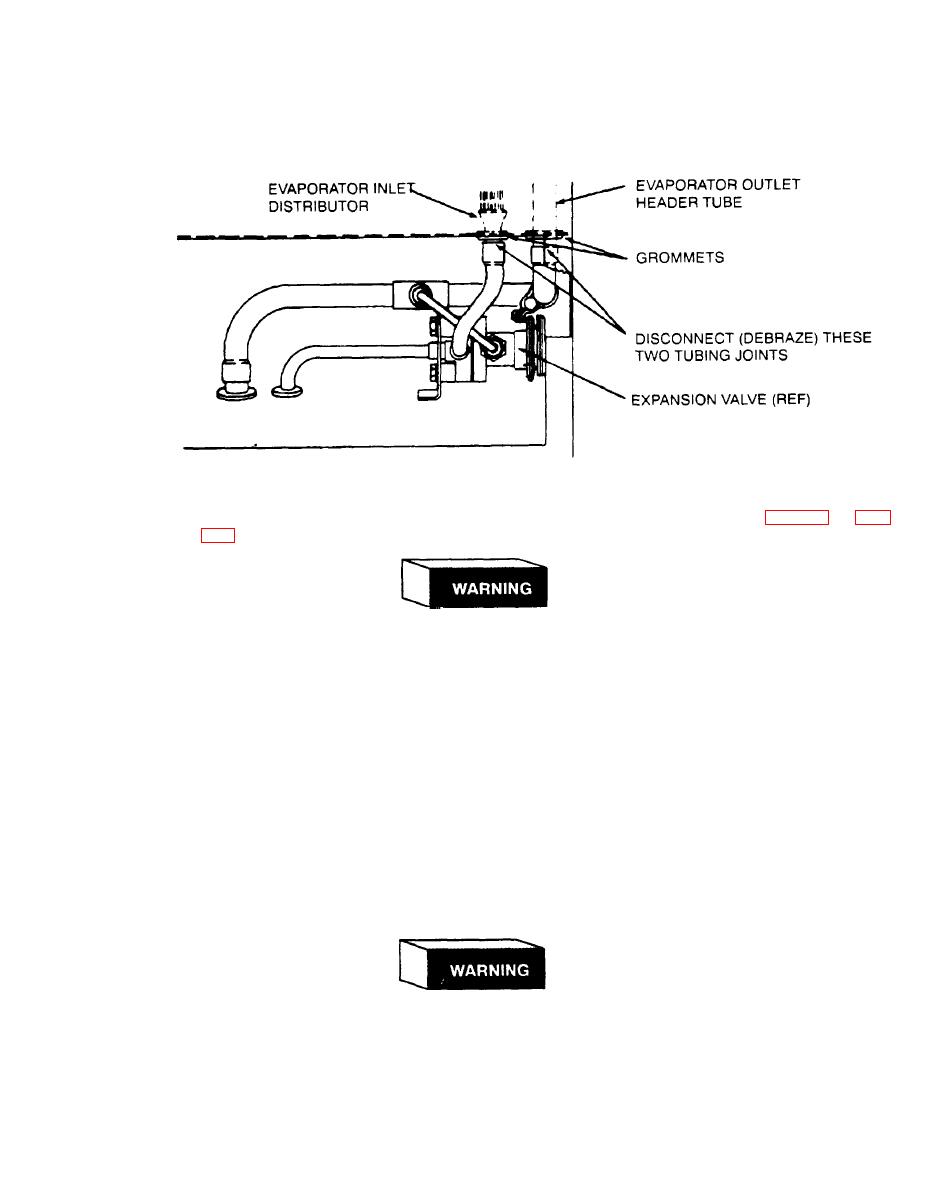
5-23. EVAPORATOR COIL - Continued.
(7) While purging the system with nitrogen, debraze the tube joints to the evaporator. (See para 5-8 and para
When handling coils, wear gloves to avoid cuts and reduce fin damage on the
coil.
(8) Using screwdriver, remove twelve screws while supporting the evaporator coil
(9) Using gloves to protect your hands and coil fins, carefully lift the coil up and out of the unit.
Repair
b.
(1)
Repairs are limited to replacement of distributor, rivets, plate nuts, and straightening of mashed fins.
Plate nuts may be removed by drilling out old rivets using a drill bit slightly smaller than the diameter of the
(2)
rivet,
Install new plate nut(s) and rivets.
(3)
If fins are mashed or dented so that air flow across coil would be blocked, straighten them using a plastic
(4)
fin comb,
To replace distributor, debraze distributor from distributor lines, Braze new distributor to the lines, Check
(5)
to be sure that all lines are clean and not blocked internally with solder or flux
c.
Installation
When handling coils, wear gloves to avoid cuts and reduce fin damage on the
coil.
(1) Carefully slide evaporator coil down into unit and aline mounting holes.
(2) Using screwdriver, secure evaporator coil with twelve screws.

