
TM9-4120-401-14
4 - 3 7 . RECTIFIER (CR4) - continued
b.
Test.
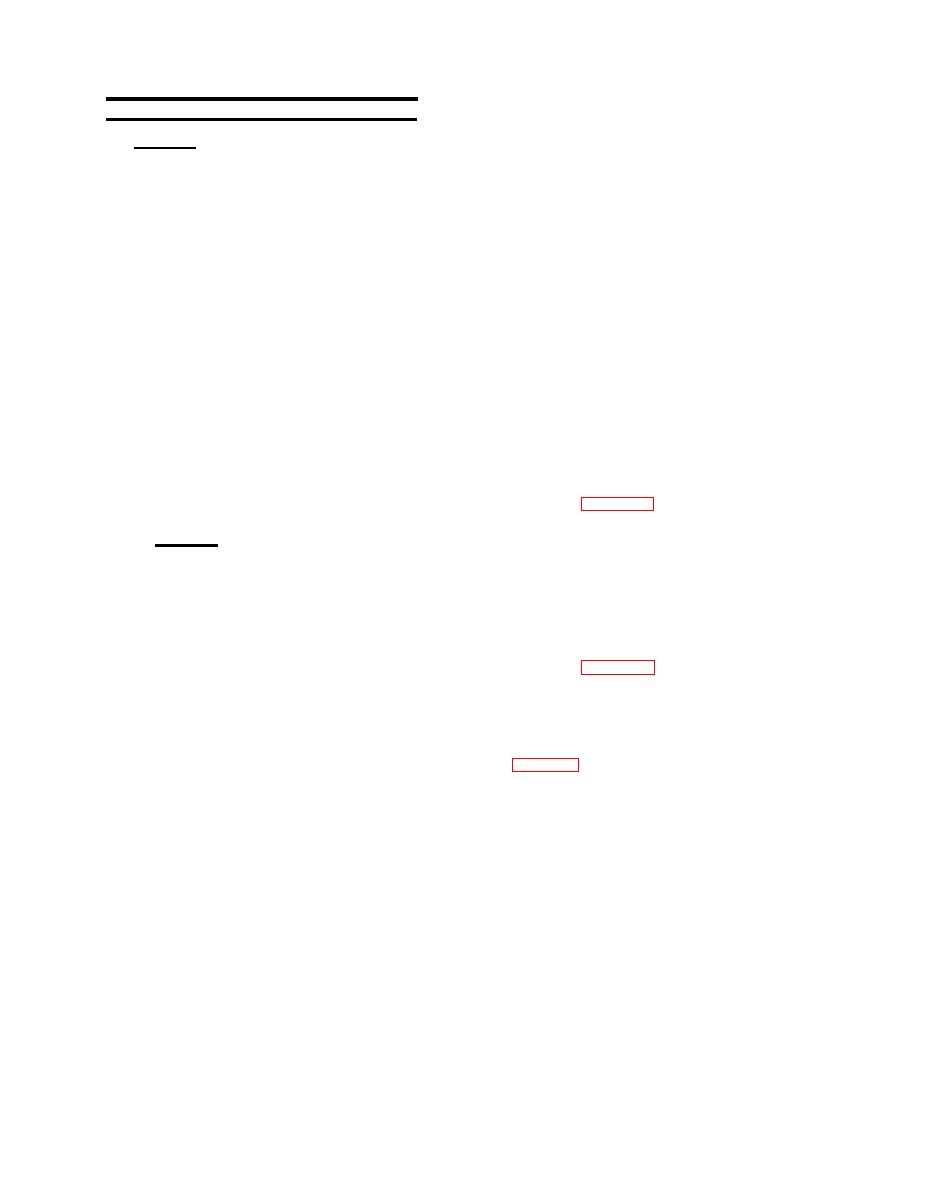
(1) Tag and disconnect wire leads from rectifier (1) terminals.
Remove nut (2), bck washer (3), flat washer (4), and rectifier (1).
(2)
(3) Using a rnultimeter on high ohms setting conneot negative (-) lead to terminal 2 and positive (+) lead to
terminal 1 or 3. A low resistance reading should be indicated.
(4) Conneot positive lead to terminal 2 and negative lead to terminal 1 or 3. An open circuit should be
indioated.
(5) Connected positive lead to terminal 4 and negative lead to terminal 1 or 3. A short circuit should be
indiciated.
(6) Connect negative lead to terminal 4 and positive lead to terminal 1 or 3. An open circuit should be
indicated.
Replace defeotive reotifier.
(7)
(8) If rectifier (1) tests good, install in unit using flat washer (4), bck washer (3), and nut (2).
(9) Connect wire leads in place using tags and wiring diagram (figure 4-6). Remove tags.
c. Replace.
(1) Tag and disconnect wire leads from rectifier (1) terminals.
(2) Remove nut (2), Iock washer (3), flat washer (4), and rectifier (1).
(3) Install new rectifier (1) in unit using, flat washer (4), took washer (3), and nut (2).
(4) Connect wire leads in place using tags and wiring diagram (figure 4-6). Remove tags.
NOTE
FOLLOW-ON MAINTENANCE:
Install top panel (para 4-11).
Connect power at power source.
4-91

