
TM 9-4910-638-14&P
LAPPING THE ROUGHING TOOL
On the roughing tool, figure 5, a part of portion 1 and all of portion 2 remove the metal in boring and are, therefore, the
parts of the tool that wear must be reconditioned. The lapping operations will be as follows:
1 - The first operation is to lap the tool face, figure 5, by using the small lapping jig shown in figure 6. Lap only
until you have removed all built-up material from the face of the tool.
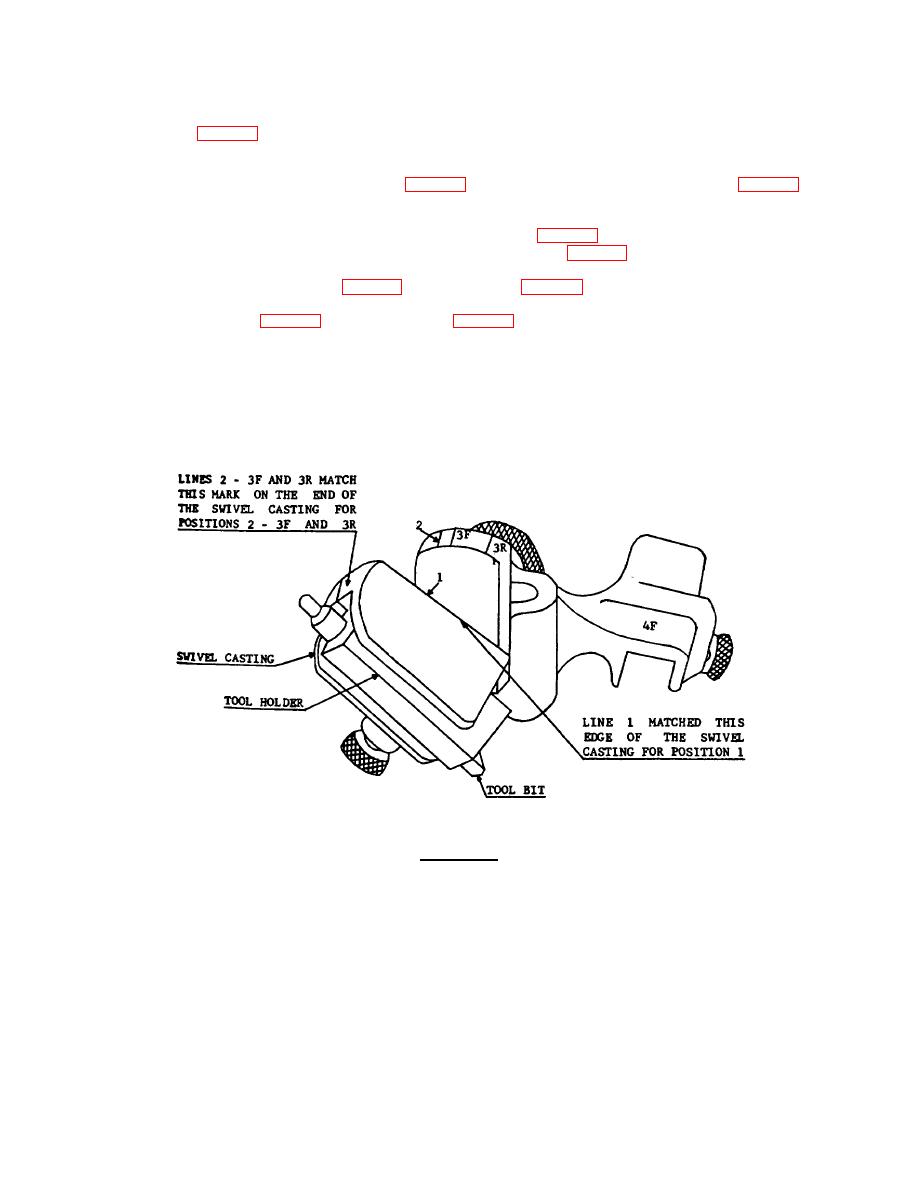
2 - Then place the tool holder in the large lapping jig as shown in figure 7 and set the swivel casting that holds the
tool to position 1 as illustrated. Lap in this position until portion 1, figure 5, is smooth.
3 - Shift swivel casting to position 2, figure 7, and lap portion 2, Figure 5, until portion 2 is in good condition.
4 - Shift to position 3R, figure 7, and lap portion 3R, figure 5, until 2 has the proper width. For roughing tool, this
width should be eight thousandths for the average size bore.
Under ordinary conditions, the roughing tool will bore six cylinders without relapping. There are exceptions, however, when
the tool should be lapped more often, due to hard material or large and long bores. Examine the tool after each hole to
check its condition. A sharp free-cutting tool requires less power maintains consistent hole size so time spent in touching
up the tool will improve results.
FIGURE 7.
LARGE LAPPING JIG SHOWING THE DIFFERENT
POSITIONS FOR LAPPING THE TOOL
- 11 -

