
TM 55-4920-384-13&P
have been out of operation for a while, the hand
gine, follow instructions on switch tag.
primer lever on the fuel pump adapter should be used
to pump gasoline into the dry carburetor. When prim-
STARTING
ing, a distinct resistance of the fuel pump diaphragm
should be felt when moving the hand lever back and
STARTING PROCEDURE for -25F. to +120F.
forth. If this is not the case, the engine should be
1. Check crankcase oil level.
turned over a revolution so that the fuel pump cam
will be rotated from its upper position, which would
2. Open fuel valve after checking gasoline supply in
prevent priming. The hand lever should be given
tank.
about 20 to 30 strokes, depending on how much fuel,
3. Disengage clutch (if applicable).
if any, there is in the carburetor float chamber, see
4. New engines require priming; refer to "Fuel Pump"
lever will move more easily.
paragraph for instructions.
5. Set magneto switch in running position.
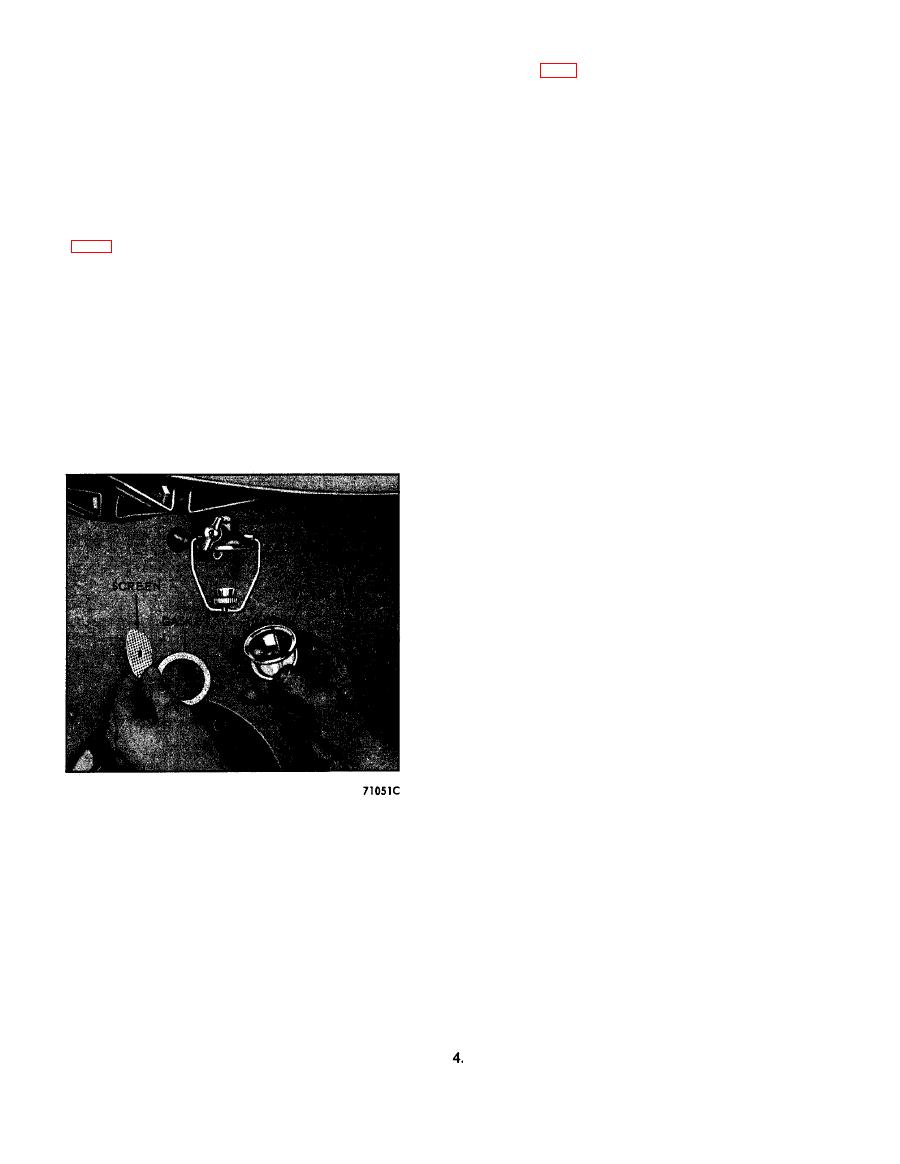
GASOLINE STRAINER
6. If engine is equipped with a variable speed control,
The gasoline strainer is very necessary to prevent
set throttle about 1/2 open; fixed speed governors
sediment, dirt and water from entering the carburetor
require no setting, and over center idle control
and causing trouble or even complete stoppage of the
should be in full load position.
engine. The strainer bowl should be inspected fre-
quently, and cleaned if dirt or water are present. To
7. Close carburetor choke by pulling choke button to
remove bowl, first shut off fuel valve, then loosen
extreme out position.
the knurled nut below bowl and swing the wire bail
8. Turn engine over one or two revolutions. Push
to one side. After cleaning bowl and screen, re-
choke button in about half-way and then pull up
assemble the parts, being sure the gasket is in good
briskly on the starting crank. Do not attempt to
condition; otherwise use a new gasket. See Fig, 8,
spin the engine with the starting crank. If the en-
gine does not start on the first pull up of the
crank, re-engage the crank and repeat the oper-
ation.
With electric starting motor; depress starter button
switch. The engine should start within 2 or 3
crankshaft revolutions. If starting difficulty is ex-
perienced, do not `grind away' at the starter, but
rather attempt short intermittent starting cycles.
9. After engine starts, push in choke button as re-
quired for smooth running. Choke must be com-
pletely open when engine is warmed up.
If flooding should occur, open choke fully, by push-
ing choke button in and continue cranking. More
cranking is necessary when starting in cold temper-
atures than in warm.
If the engine will not start, check to determine if fuel
is being supplied to the engine. Also check ignition
wire contacts at magneto and spark plugs. See. Start-
Fig. 8
ing Difficulties, Page 14.
If the starter is `dead' or is unable to turn the engine
which shows the gasoline strainer mounted to the fuel
over, check battery and cable connections at the
tank of a power unit. On open engines, the strainer
battery, starting motor, and starting switch; also
is mounted to the inlet of the fuel pump.
check for broken or frayed cables. Test starting
switch and starting motor and replace or repair if
IGNITION SWITCH
necessary.
On MIL-E-11275-C spec engines, a positive action
STARTING at -69F. to -25F.
ground switch is located at the bottom of the mag-
neto end cover. The switch button is pulled out when
1. Apply starting aids.
starting the engine and pushed in for stopping. En-
2. Follow instructions for starting at -25F. to
gines built to the MIL-E-11275-B and MlL-E-11275-A
+ 120F.
specifications have a spring type switch button which
is always in the on or running position, and must be
3. Operate engine at 1800 R.P.M. without load for a
depressed and held down until engine stops.
minimum of 10 minutes.
On power units, the magneto ignition switch is on the
Increase speed to rated R.P.M. of engine for an
outside of the house panel, at the flywheel end. See
additional 5 minutes before applying load.
D-10
