TM 55-1925-282-14&P
0028 00
1
2
5
4
3
4
3
5
2
6
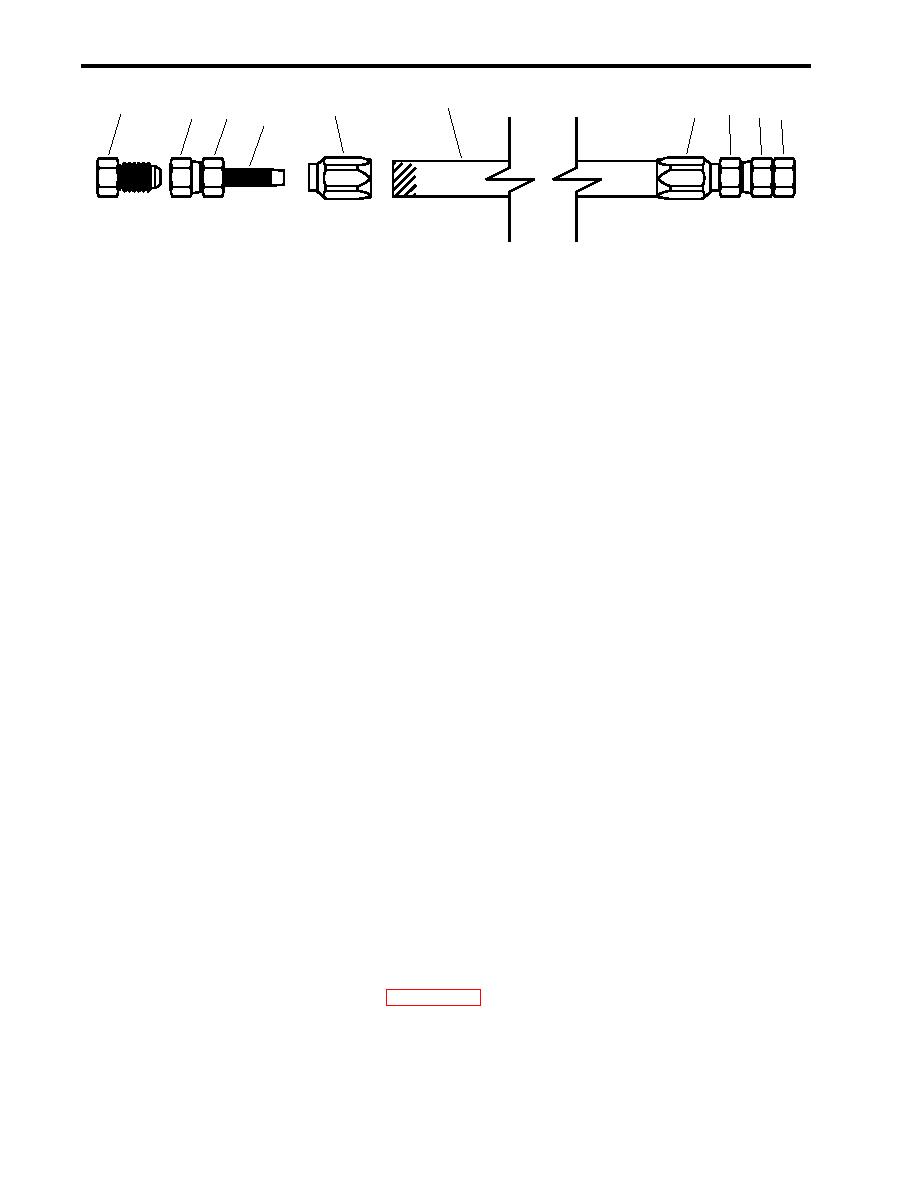
Figure 1. High Pressure Hose
FABRICATE HIGH PRESSURE HOSE SECTION
1. Measure the complete length of the old hose from end to end, including the length of all installed fittings.
2. Cut the new section of high pressure hose 2 in (70 mm) shorter than the measurement of the entire length
of the old high pressure hose.
3. Disassemble the old hose by holding the sockets (figure 1, item 4) stationary and rotating the female fittings
(figure 1, item 5) counterclockwise until removed.
4. Separate the old high pressure hose (figure 1, item 1) from the sockets (figure 1, item 4) and discard the
faulty section of high pressure hose.
5. Inspect the female fittings (figure 1, item 3), male fittings (figure 1, item 2), and the sockets (figure 1, item 4)
for excessive wear and damage. Replace any damaged parts.
6. Lubricate the ends of the replacement high pressure hose (figure 1, item 1) with silicone compound.
7. Install the ends of the high pressure hose (figure 1, item 1) in the sockets (figure 1, item 4) by holding the
sockets stationary, and rotating the high pressure hose counterclockwise until it bottoms in the socket.
8. Rotate the high pressure hose (figure 1, item 1) clockwise in the socket (figure 1, item 4) turn, and ensure
that the hose is not bottomed in the socket.
9. Lubricate the threaded nipple (figure 1, item 6) on each of the female fittings (figure 1, item 5) with silicone
compound.
10. Install the female fittings (figure 1, item 5) in the sockets (figure 1, item 4) by holding the sockets stationary
and rotating the female fittings clockwise until snug. Back off 1/8 of a turn.
INSTALLATION
1. Install the high pressure hose (figure 1, item 1) using the two wrench method by holding the male fitting
(figure 1, item 2) stationary, and rotating the female fitting (figure 1, item 3) until tight.
2. Remove the lockouts and tagouts (FM 55-502).
3. Perform startup on the applicable ROWPU (WP 0005 00), and check for any leaks.
4.
Return the equipment to the desired readiness condition.
END OF WORK PACKAGE
0028 00-2

