
TM 55-4920-384-13&P
(b) Blow out all passages in the air intake assembly,
wise) to increase the speed and out (counter-clockwise) to
fuel bowl assembly and throttle body. NOTE: Be
decrease the engine speed.
sure all carbon deposits have been removed from
Adjust the idle adjusting needle to obtain smooth idling
throttle bore and idle discharge holes. It is advis-
of the engine at idling speed. Turn the needle out (counter-
able to reverse flow of compressed air in all pas-
sages to insure all dirt has been removed. Never
use a wire or drill to clean out jets.
B. INSPECT PARTS
(a) Float Assembly. Replace float assembly if loaded
with gasoline, damaged, or if float axle bearing is
worn excessively. Inspect top side of float lever for
wear where it contacts fuel-valve needle.
(b) Float Axle. Replace if any wear can be visually
detected on the bearing surface.
(c) Fuel Valve Seat & Needle Assembly. Replace fuel
valve seat and needle because both parts wear and
may cause improper float level.
(d) Idling Adjusting Needle and Spring. Inspect point
of needle. This must be smooth and free of ridges.
(e) Gaskets and Fibre Washers. Replace all gaskets
and fibre washers every time the carburetor is
disassembled.
(f) Check Specifications. Verify the correctness of the
following parts. Numbers will be found on the
parts. Venturi; Main Jet; Idling Jet; and Fuel Valve
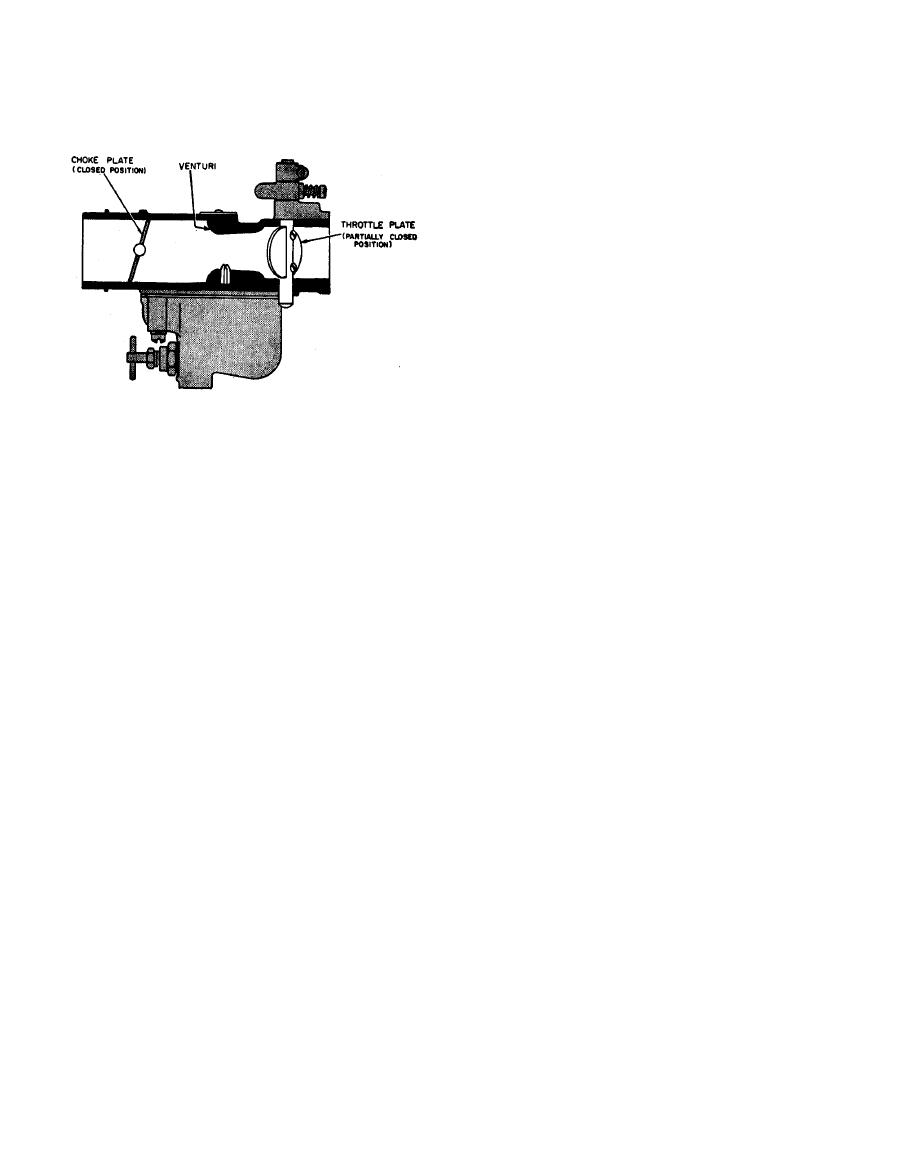
CHOKE SYSTEM
clockwise) to make the mixture richer, and in (clockwise)
REASSEMBLY
to make it leaner,
Adjust the main jet adjustment for full power of the
A. REASSEMBLE THROTTLE BODY
engine while under a load. Turning the adjusting needle
out (counter-clockwise) makes the mixture richer while
(a) Install the fuel valve seat (31 ) and fibre washer (30),
turning the needle in (clockwise) cuts off the flow of fuel
using Zenith Tool No. C161-85.
to make the mixture leaner.
(b) Install the main discharge jet (32), using a small screw-
NOTE: Do not try to operate on a very lean mixture;
driver.
better
performance and better fuel economy will be
(c) Install fuel valve needle in seat (31), followed by float
obtained if the mixture is not too lean.
(36) and float axle (35). NOTE: Insert tapered end of
float axle (35) into float bracket on side opposite slot
DISASSEMBLY
and push through the other side. Press float axle (35)
A. IDENTIFY CARBURETOR
into slotted side until the axle is centered in bracket.
(a) Check numbers on metal identification disk riveted
(d) Fuel Level. Check position of float assembly (36) for
to top of throttle body. The inside number next to
correct measurement to obtain proper fuel level using a
the rivet is the Zenith assembly number and the
depth gage. NOTE: Do not bend, twist, or apply
one next to the outer edge of the disk is the vehicle
manufacturers.
With bowl cover assembly (26) in an inverted position,
viewed from free end of oat (36), the float body must
B. DISASSEMBLED VIEWS
be centered and at right angles to the machined surface.
(a) The disassembled view will identify the various
The float setting is measured from the machined surface
component parts and show the relation to assembly.
(no gasket) of float bowl cover to top side of float body
Use the disassembled view to identify and locate
at highest point. This measurement should be 31/32"
parts when performing the disassembly and re-
plus or minus 1/32".
assembly operations.
(e) Bending Float Lever. To increase or decrease distance
C. SEPARATE CARBURETOR BODIES
between float body (36) and machined surface (26) use
(a) Remove the three bowl assembly screws (45 & 46) and
long nosed pliers and bend lever close to float body.
separate fuel bowl (39) from throttle body (26).
NOTE: Replace with new float if position is off more
than 1/16".
D. DISASSEMBLE FUEL BOWL
(f) Install throttle body to fuel bowl assembly gasket (37 )
(a) Remove the main jet adjustment (43) and fibre washer
on machined surface of throttle body (26).
(42), using a 9/16" open end wrench.
(g) Install the idle adjusting needle (17) and spring (18).
(b) Remove the main jet (41) and fibre washer (40), using
Zenith Tool No. C161-83 main jet wrench.
B. REASSEMBLE FUEL BOWL
(c) Remove the Idle Jet (38), using a small screwdriver.
(a) Install the main jet (41 ) and fibre washer (40), using
(d) Remove the bowl drain plug (44).
Zenith Tool No. C161-83 main jet wrench.
E. DISASSEMBLE THROTTLE BODY
(b) Install the main jet adjustment (43) and fibre washer
(a) Remove the float axle (35) by pressing against the end
(42), using a 9/16" open end wrench.
with the blade of a screwdriver.
(c) Install the idle jet (38), using a small screwdriver.
(b) Remove the float (36).
{d) Install the bowl drain plug (44).
(c) Remove the fuel valve needle (31 ), using the fingers.
(d) Remove the fuel bowl to throttle body gasket (37).
C. REASSEMBLE CARBURETOR BODIES
(e) Remove the main discharge jet (32), using a small
(a) Install the three bowl assembly screws (45 & 46) through
the fuel bowl and into the throttle body and draw down
(f) Remove the fuel valve seat (31) and fibre washer (30),
firmly and evenly.
using Zenith Tool No. C161-85.
(g) Remove the idle adjusting needle (17) and spring (18).
SPECIAL TOOLS
The special tools recommended for the 87-Series carburetors
CLEAN AND INSPECT PARTS
are:
A. CLEAN PARTS
1. C161-83 Main Jet Wrench.
(a) Clean all metal parts thoroughly with cleaning solution
2. C161-85 Fuel Valve Seat Wrench.
and rinse in solvent.
D-76
