TM9-2330-368-14 & P
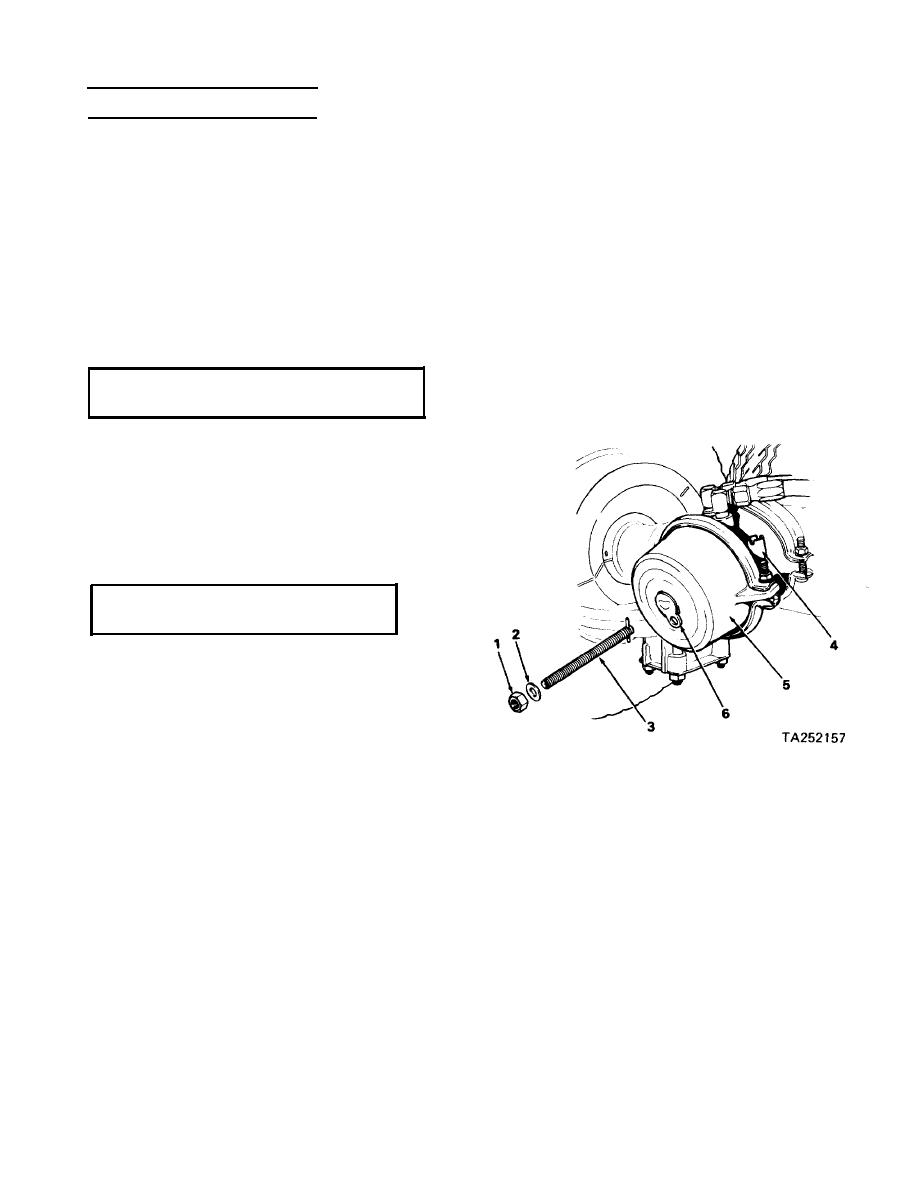
(4) Insert release stud (3) into chamber
[ 2-25. OPERATION IN MUD
hole and turn one-quarter turn clock-
wise to engage stud in pressure plate.
CAUTION
Under no circumstances will the trail-
(5) Install nut (1) and washer (2) on release
er be pushed at the rear or damage to
stud (3) and tighten nut to cage the air
trailer may result.
chamber springs.
If one or more wheels sink into the mud, it
a.
(6) Repeat steps (2) through (5) for re-
may be required to jack-up the mired wheel
maining brake air chambers.
and insert planking or matting beneath it.
(7) Remove chocks from under wheels.
b. Clean off all mud as soon after operation as
possible.
(8) Move trailer to side of road with cau-
tion.
(9) Re-chock wheels to prevent trailer
2-26. OPERATION IN DUSTY OR SANDY
movement.
AREAS
CAUTION
Under no circumstances will the trail-
er be pushed at the rear or damage to
trailer may result.
Frequently clean, inspect and lubricate the trailer.
2-27. OPERATION WITH AIR BRAKE
FAILURE
CAUTION
Do not attempt to operate the trailer
with the air chamber springs caged
except to move the vehicle out of the
traveled portion of the highway in the
event of an air system failure.
a. Caging Brake Air Chambers.
b. Uncaging Brake Air Chambers.
(1) Block trailer to prevent movement by
(1) Loosen and remove nut (1) and washer
using chocks under wheels.
(2).
WARNING
(2) Turn release stud (3) one-quarter turn
Do not remove flange nuts or
counterclockwise to free stud from
bolts. High spring pressure inside
pressure plate. Withdraw release stud.
of air chamber can cause injury if
released.
(3) Insert release stud (3) in pocket (4) and
install nut ( 1 ) and washer (2) onto stud.
(2) Remove nut (1), washer (2) and release
(4) Install plug (6) in brake air chamber
stud (3) from mounting pocket (4) on
(5).
brake air chamber (5).
(5) Remove wheel chocks.
(3) Remove plug (6).
2-28

