
TM 9-4910-638-14&P
LAPPING THE FINISHING TOOL
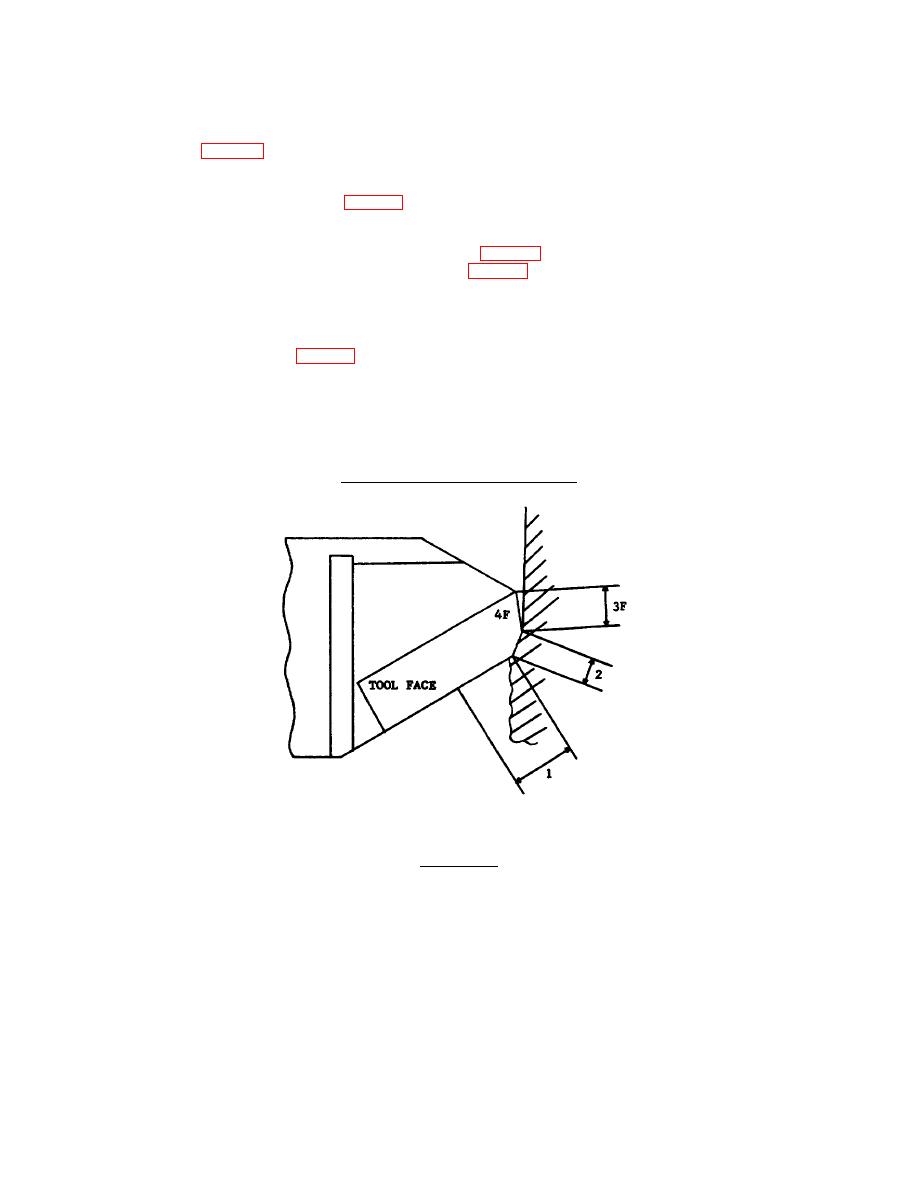
On the finishing tool, figure 8, portion-2 is the part that produces the finish cut. The condition of portion 2, therefore,
determines the final finish. The finishing tool bit is lapped only in the large jig and in positions 4F, 1,2, and 3F.
1 - The first operation is to lap the tool face, figure 8, with the tool in position 4F of the large lapping jig. Lap only until you
have removed all built up material from the face of the tool.
2 - Then place the tool holder in the large lapping jig as shown in figure 7 and set the swivel casting which holds the tool to
position 1 as illustrated. Lap in this position until portion 1, figure 8, is smooth.
3 - Shift the swivel casting to position 2 and lap portion 2 until it is smooth.
4 - Then shift to position 3F and lap portion 3F until 2 has the proper width This should be from .020" to .050", depending
on the bore size, as explained on Page 13 under Most Important Part of the Tool .
5 - Lap the finishing tool as outlined above, AFTER EVERY HOLE.
To fully understand the purpose of each lapping operation, carefully study the d views of the tool, at the same time holding
one of the tools in your position shown in these views.
FINISH BORED CYLINDER WALL
FIGURE 8.
FINISH BORING TOOL BIT IN
CUTTING POSITION
- 12 -
