
TM 9-2330-371-14&P
UPPER TORQUE ROD - CONTINUED
ACTION
ITEM
REMARKS
LOCATION
CLEANING, INSPECTION, AND REPAIR CONTINUED
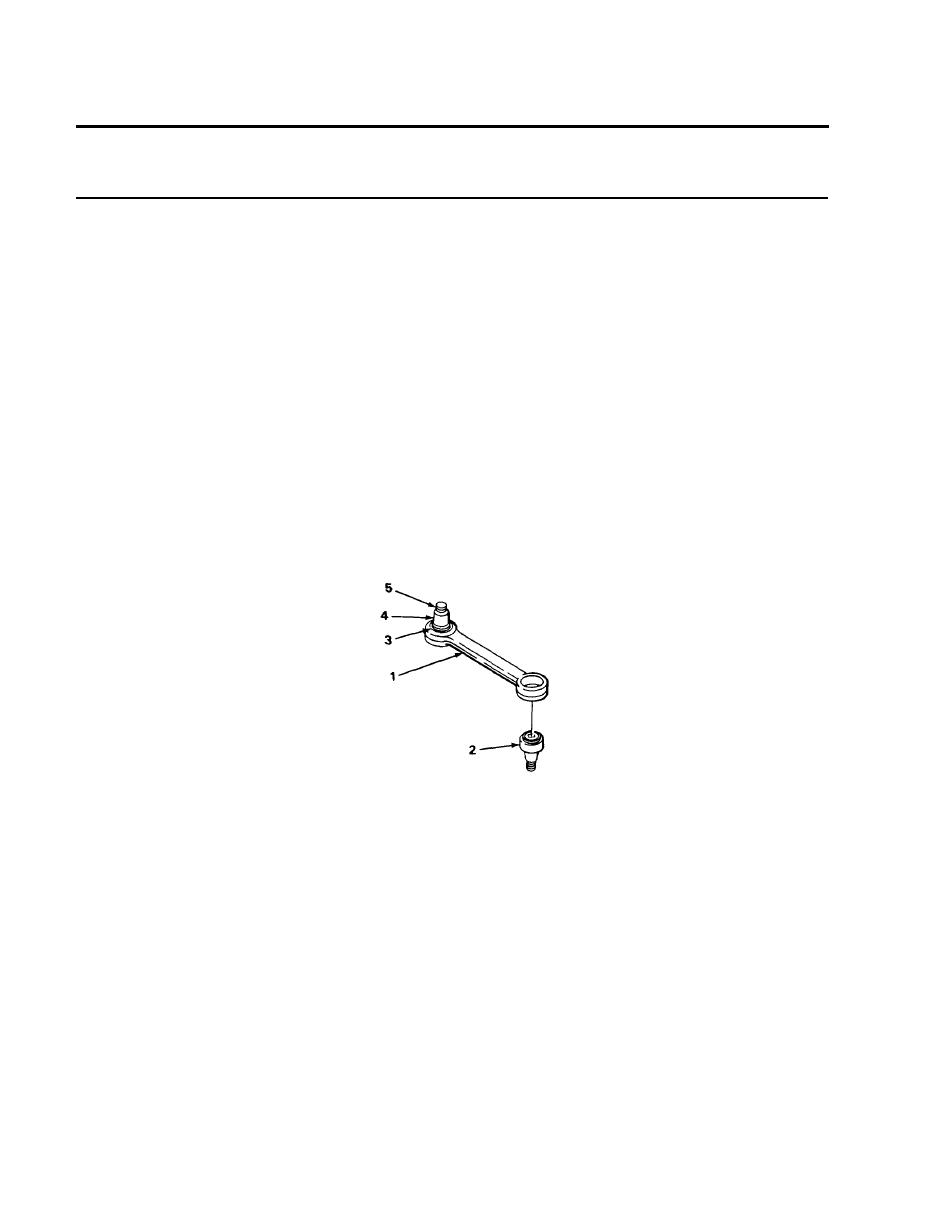
Torque rod (1)
Wash with water and soft brush. Clean off
10.
grease with rags and solvent, if necessary.
Two ball/studs (2)
Inspect rubber mounting (3) for elas-
a.
11.
ticity, breaks, or loose ball mounting.
Inspect tapers (4) for nicks, burrs, or
b.
raised metal.
Smooth with crocus cloth and dry-
cleaning solvent.
c.
Check stud threads (5) for burrs or any
other damage.
If damaged, do steps 11d and 11e.
Press out damaged balllstuds (2)
d.
using arbor press.
Press in replacement ball/studs (2)
e.
using arbor press.
INSTALLATION
Torque rod (1)
Using porta power, and assistant push ball/
Axle bracket (6)
12.
and bogie
stud ends (2) into axle bracket (6) and
bracket (7)
bogie bracket (7).
If hole in axle bracket (6) does not
line up with ball/stud end (2), ro-
tate axle (8) as needed.
Nut (9)
Ball/stud
Screw onto ball/stud end (2) and tighten,
13.
end (2)
using torque rod socket and handle.
Cotter pin (10)
14.
Nut (9)
Put into nut (9) and ball/stud end (2) and
bend down ends using pliers.
TA224340

