
TM 9-2330-211-14&P
Table 4-2. Unit Troubleshooting (Con't).
MALFUNCTlON
TEST OR INSPECTION
CORRECTIVE ACTION
SLOW BRAKE APPLICATION OR SLOW RELEASE.
6.
Check for restriction in air lines and hoses.
Step 1.
If air lines or hoses are restricted, repair (para 4-28).
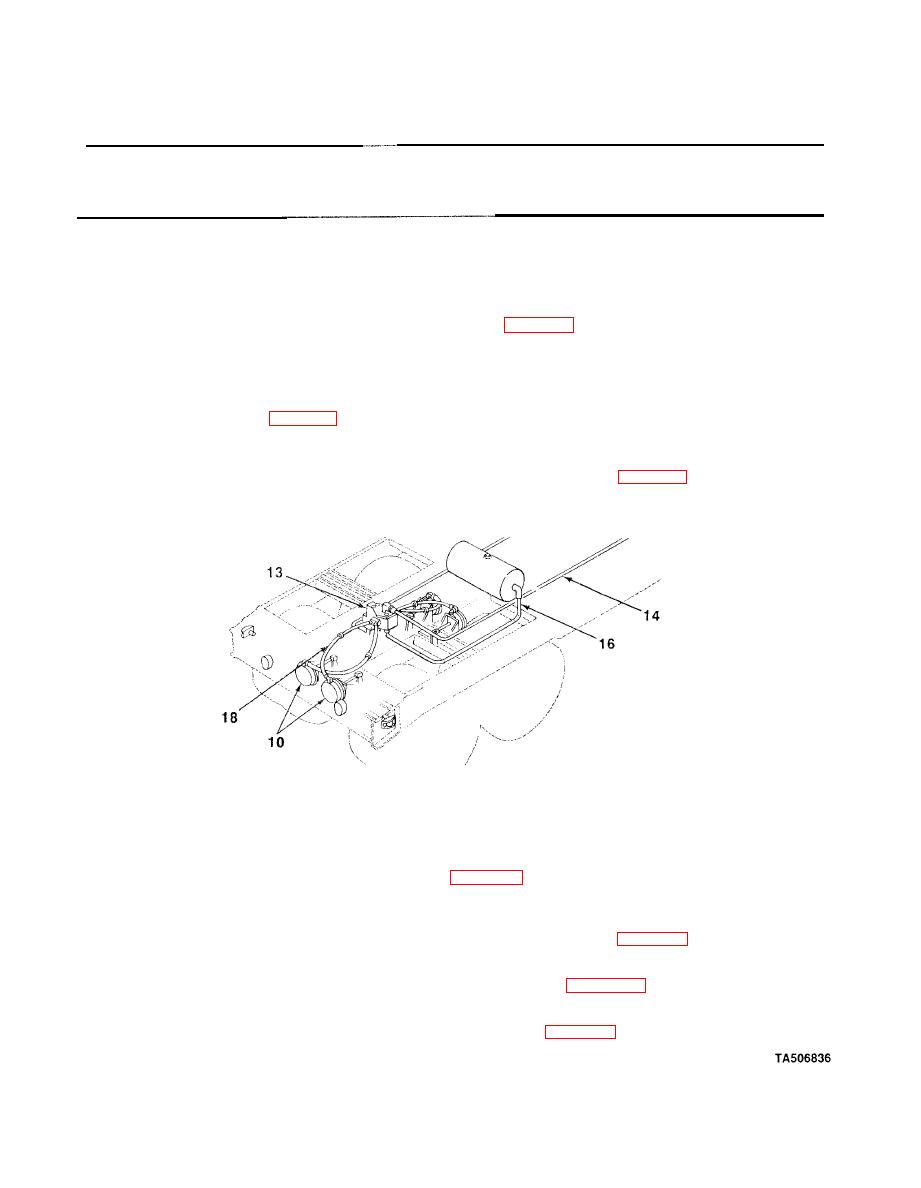
Loosen service air line (14) coming into emergency relay valve (13) and apply brakes. Air should
Step 2.
leak when brakes are applied and stop when released.
If air does not leak when brakes are applied, service air line (14) is clogged. Repair service air
line (para 4-28).
Cautiously loosen air line (16) at emergency relay valve (13). Apply and release brakes.
Step 3.
If no air is leaking, air line (16) is clogged. Repair air line (para 4-28).
Loosen air line (18) to airbrake chamber (10) at emergency relay valve (13). Apply and release
Step 4.
brakes. Air should leak when brakes are applied and stop when released.
If air does not leak when brakes are applied, the emergency relay valve (13) is defective.
Replace emergency relay valve (para 4-31).
Check airbrake chambers (10) for dents and cracks.
Step 5.
If airbrake chambers (10) are dented or cracked, replace (para 4-30).
Apply brakes. Listen and feel for airbrake chamber (10) leaks other than those caused by first
Step 6.
applying brakes. If leak is not obvious, put soap (Item 4, Appendix E) solution on seams and check
for bubbles.
If airbrake chambers (10) are leaking, replace (para 4-30).
4-16
