TM 55-1925-282-14&P
0022 00
1
3
3
2
9
9
4
4
5
5
8
8
6
6
7
7
10
12
11
11
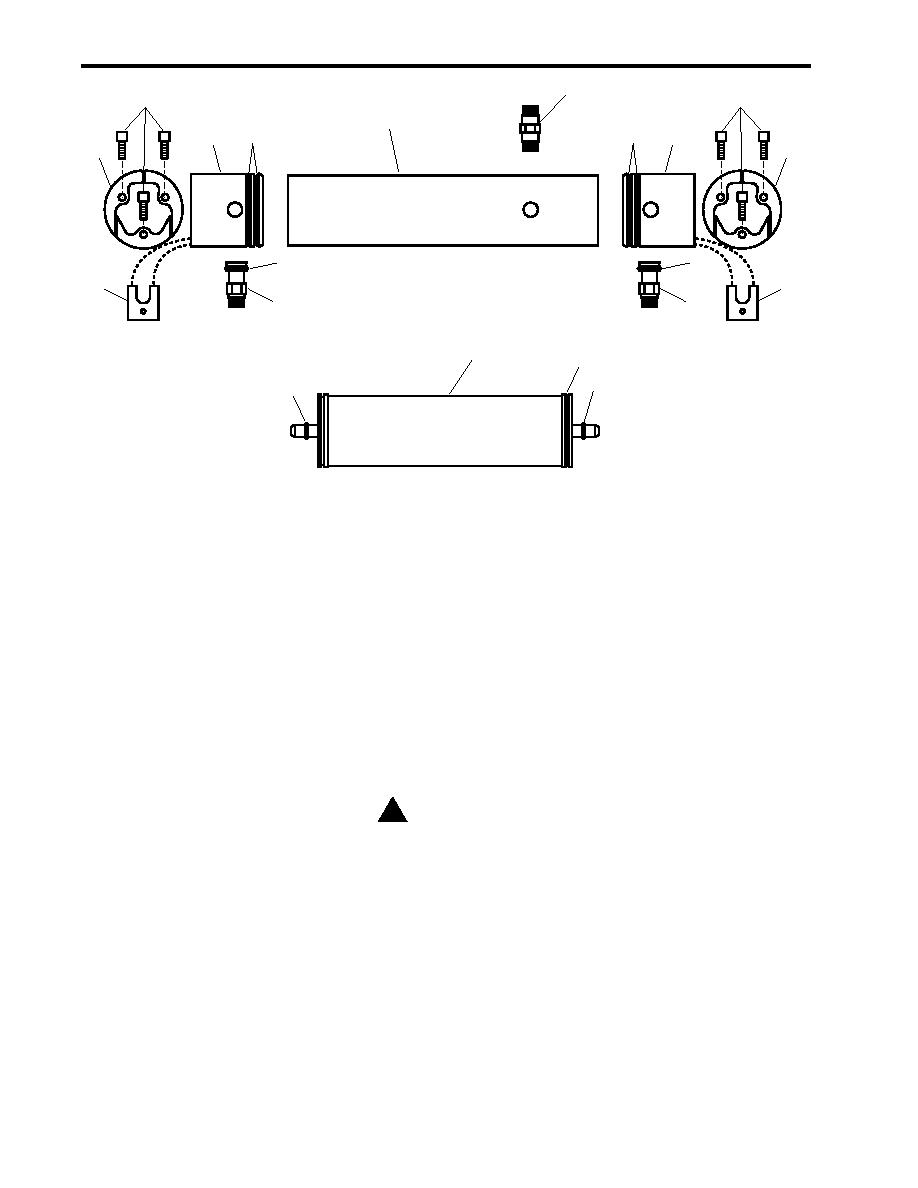
Figure 3. RO Membrane and Vessel Subassembly Repair
11. Inspect the interior of the high pressure vessel (figure 3, item 2) for cracks and smoothness. Replace the
high pressure vessel if the interior is not crack free and smooth.
12. Clean each end plug (figure 3, item 4) and the high pressure fittings (figure 3, item 7) with clean wiping rags
and water.
13. Inspect each end plug (figure 3, item 4) and the high pressure fittings (figure 3, item 7) for damage and wear.
ASSEMBLY
1. Lightly lubricate two new product water O-rings (figure 3, item 11) with silicone lubricant and install the prod-
uct water O-rings on the new RO membrane element (figure 3, item 10).
! CAUTION
Each end of the RO membrane element contains a " x 1" product water tube. The
outside surface is a sealing surface that separates the product water from the raw water.
The outside sealing surface must remain scratch free. Never use any type of grabbing
tool on or near the product water tube. Failure to comply with this caution will cause
contamination of the product water and unrepairable damage to the RO membrane
element.
NOTE
The new RO membrane element comes complete with a brine seal installed on the
product water outlet/raw water inlet side of the membrane. The brine outlet side of the
new RO membrane does not have an O-ring installed.
2. Insert the brine outlet side of the new RO membrane element (figure 3, item 10) into the product water outlet
side of the high pressure vessel (figure 3, item 2).
0022 00-4

