
TM 9-2330-388-14
4-29.
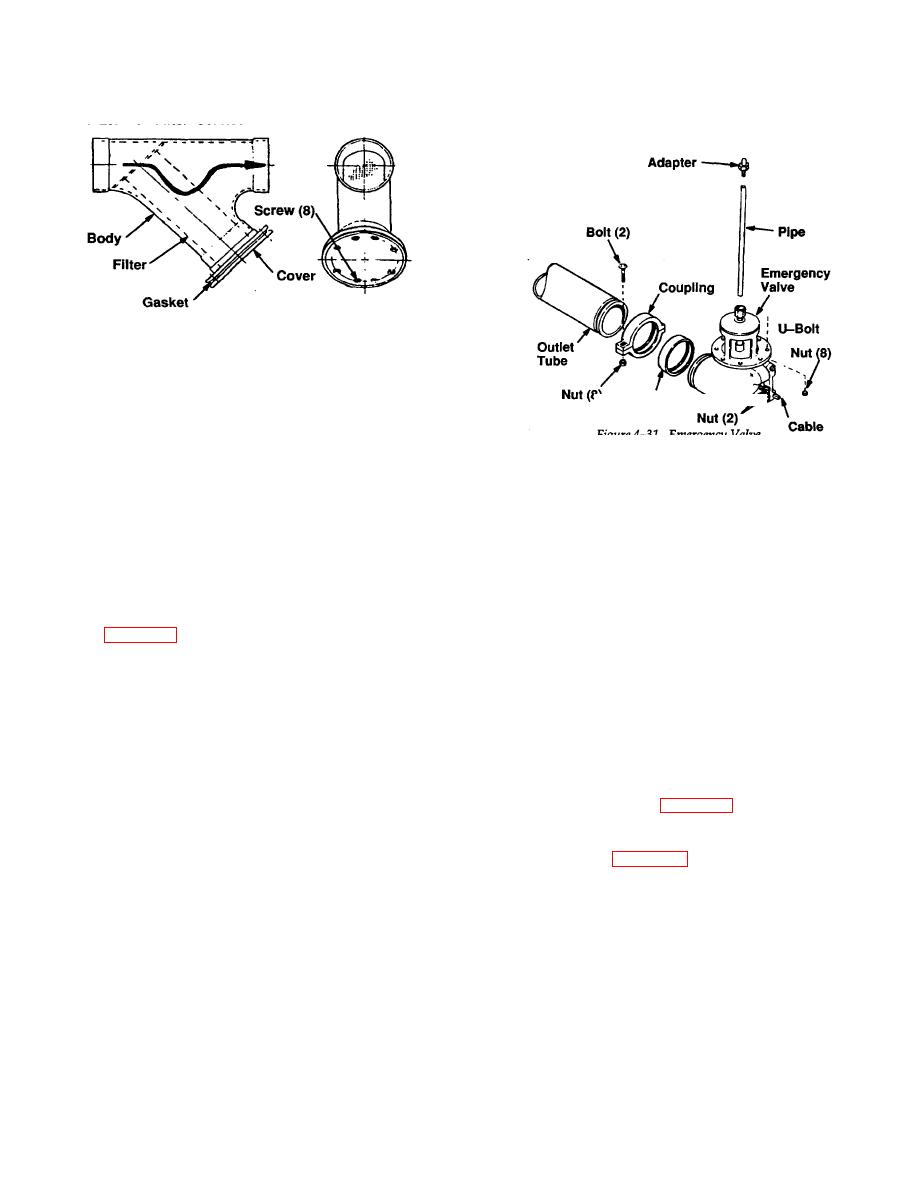
Y-Filter Service
Figure 4-30. Y-pipe Filter
(1) Close emergency valve.
(2) Open discharge valve and drain water from
path of emergency valve through discharge valve.
(3) Remove eight screws that secure cover to
Y-pipe body and remove cover, filter and gasket.
Figure 4-31. Emergency Valve
(4) Inspect filter for damage. Replace if dam-
aged. Clean with water if not damaged
(5) Remove coupling gasket from emergency
(5) Install filter, gasket and cover. Secure
valve.
cover with eight screws.
(6) Close discharge valve and open emergency
b.
Installation
valve.
(7) Open discharge valve and allow air to expel
(1) Slide coupling gasket onto emergency
until a free flow of water is observed. Then close
valve.
discharge valve and emergency valve.
NOTE
4-30.
Emergency Valve Removal and Installation,
Be sure pipe is engaged with vent.
(2) Install valve, pipe, adapter, and gasket to
a.
Removal
tank sump and attach eight nuts. Tighten nuts to 50-75
lb-ft.
(1) Loosen, but do not remove, two nuts from
(3) Slide gasket over joint and attach coupling.
U-bolt on emergency valve lever and disconnect
Tighten nuts to 104 - 116 lb-ft.
emergency valve cable.
(4) Reconnect emergency valve cable to the
emergency valve lever. Tighten the two U-bolt nuts.
CAUTION
Check for proper operation of emergency valve and
cable adjustment, part c of para 4-34.
Support large outlet tube before removing
coupling.
4-31.
Emergency
valve
Disassembly
and
Assembly, Fig. 4-32.
(2) Remove two nuts and bolts from coupling
and remove coupling. Slide gasket onto emergency
a.
Disassembly
valve.
(3) Remove eight nuts from studs securing
(1) Remove lever (1) from stem (7) by
emergency valve to sump on tank.
loosening nut (3) screw (2) and pulling lever from shaft.
(4) Remove emergency valve, pipe, adapter,
(2) Unscrew stuffing box nut (4), and remove
and gasket from tank sump.
O-ring (5) and two packing glands (6) from stuffing box
nut (4).
(3) Pull stem (7) from body (8). Cam (9) will fall
into body. Remove cam.
(4) Loosen set screw (10) and remove adapter
(11).
4-92
