TM 55-1925-286-13&P
0022 00
3
5
12
11
4
13
1
10
7
2
8
9
6
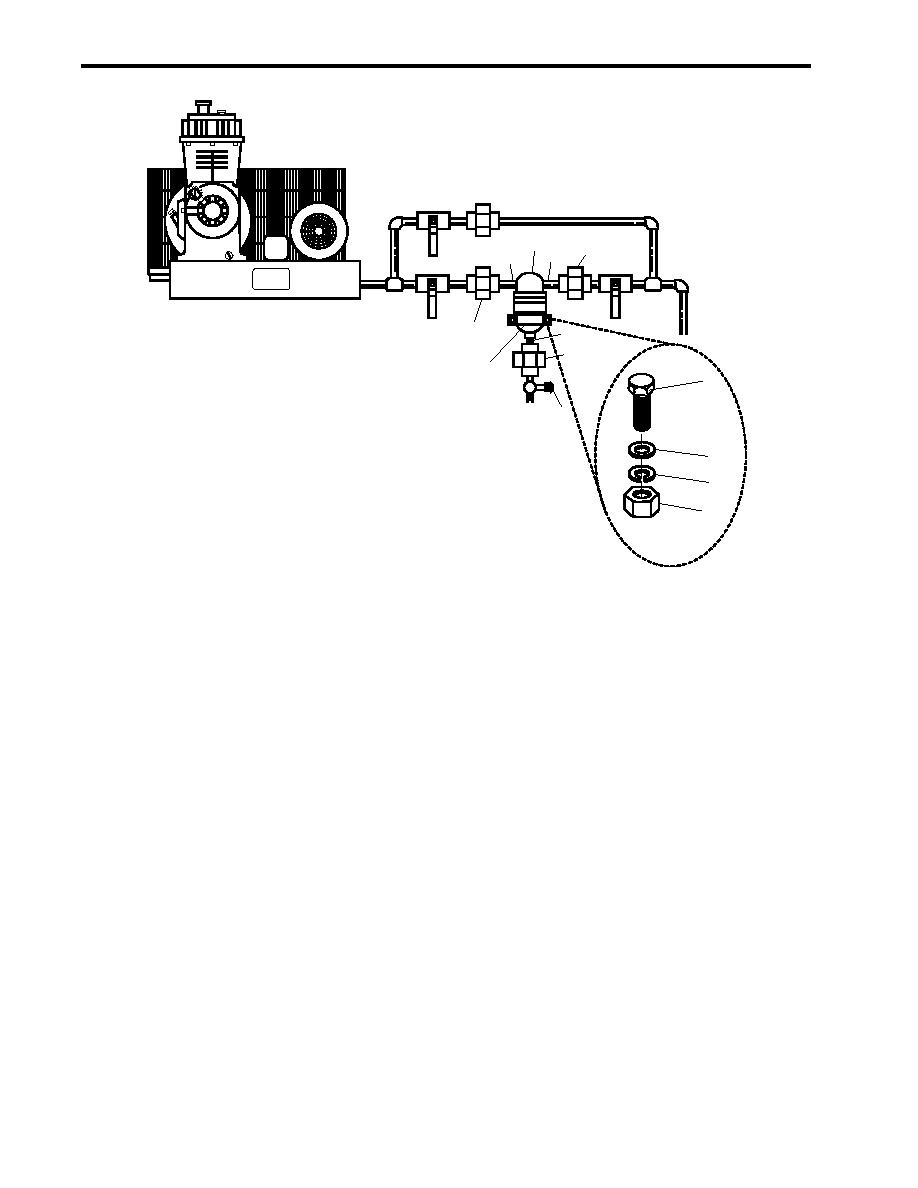
Figure 1. Air Dryer and Piping
6. Remove the two nuts (figure 1, item 6), two bolts (figure 1, item 7), two flat washers (figure 1, item 8), and two
lockwashers (figure 1, item 9) securing the mounting strap (figure 1, item 10). Remove the dryer (figure 1,
item 3). Discard the lockwashers.
7. Remove and set aside the pipe fittings (figure 1, items 11, 12, and 13) from the dryer (figure 1, item 3).
INSTALLATION
1. Wrap the male pipe threads of the pipe fittings (figure 1, items 11, 12, and 13) with antiseizing tape.
2. Install the pipe fittings (figure 1, items 11, 12, and 13) into the dryer (figure 1, item 3).
3. Position the dryer in its mounting strap (figure 1, item 10) and loosely attach the inlet and discharge pipe
unions (figure 1, items 4 and 5). Do not tighten the unions at this time.
4. Loosely attach the drain piping union (figure 1, item 1) to the drain piping (figure 1, item 2). Do not tighten the
union at this time.
5. Secure the mounting strap (figure 1, item 10) loosely with the two nuts (figure 1, item 6), two bolts (figure 1,
item 7), two flat washers (figure 1, item 8), and two new lockwashers (figure 1, item 9). Do not tighten the
fasteners at this time.
6. Tighten the inlet and discharge pipe unions (figure 1, items 4 and 5).
0022 00-2

