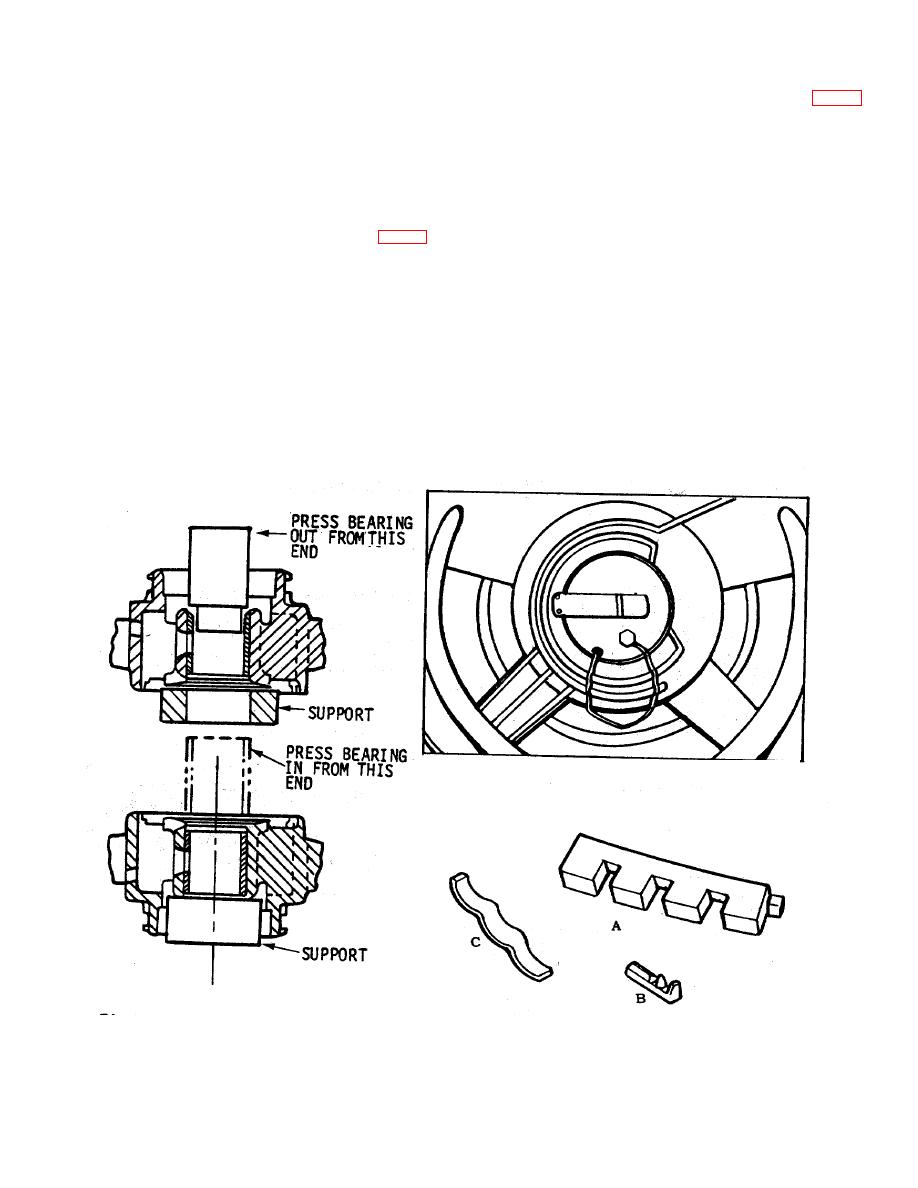
BEARING REPLACEMENT
REASSEMBLY
1.
Support the outer face of the hub (see Fig. 6)
REMOVAL
the same as in removal, except use a support plate
without a hole.
1.
Pry off the oil-well cover on the inner side of the
2.
Press the bearing from the inner side of the end
end shield. Notice how the spring-steel thrust plate is
shield until it stops against the support plate.
keyed to the end shield at four points.
3.
Place the felt packing in its original position.
2.
Remove the end cap.
4.
On the pulley-end end shield; place the oil
3.
When removing the felt packing, notice its
slinger in the outside cavity; the sharp edge should be
arrangement for proper reassembly.
toward the end cap.
4.
On the outer side of the end shield (see Fig. 6),
5.
Press on the news end cap and oil-well cover.
support the bearing-hub inside nose with a smooth collar
Aline the locating mark on the oil-well cover with the
which has a hole slightly larger than the outside diameter
locating boss on end shield (see rig. 7). Use a sealing
of the bearing.
compound on those surfaces where the cap and the
5.
From the inner side, press out the bearing with a
cover mate with the end shield. Be sure the spring-steel
tool having a guide to fit into the bearing and an outside
thrust plate is properly located before assembling the oil-
diameter slightly smaller than the outside diameter of the
well cover.
bearing.
6.
Check for any wobble of the end shield face
NOTE FIG: 8: The large wick A is a reservoir; the P
fitting against the stator shell. If wobble is over 0.004
shaped double feeder wick B supplies the sleeve and
inch gage reading, reface this surface. 00 NOT ream
thrust bearings; the narrow wick C returns oil from the
the bearing to eliminate wobble. Follow the same
outboard end of bearing to the main storage wick.
refacing procedure when repairing tight motors.
Fig. 7. Proper alinement of oil well cover on end shield
Fig. 6. Bearing replacement
FIG. 8. Oil reservoir and feeder wick
42


