TM 55-1925-284-14&P
0027 00
4. Connect the union (figure 1, item 1).
5. Perform the Follow-On Service procedure at the end of this work package.
FLANGED GATE VALVE
REMOVAL
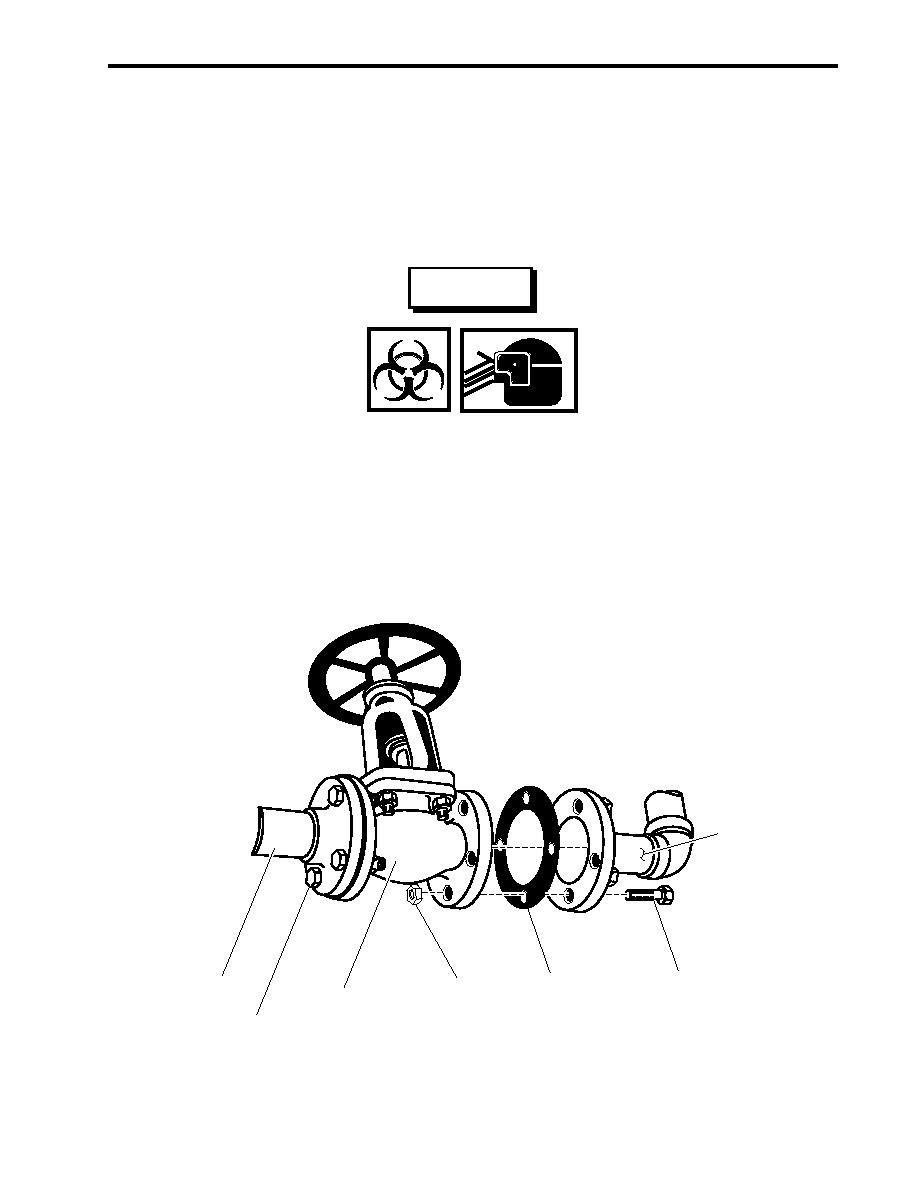
1. Place a suitable drain pan under the flanged gate valve (figure 2, item 1) to be removed.
WARNING
Sewage is a common mode of transmission for parasitic organisms that may
have the capability of causing communicable diseases. After coming in contact
with sewage or contaminated equipment, be sure to clean yourself with a disin-
fectant soap. Avoid sewage contact with skin abrasions, punctures, cuts, and
other open wounds. Wipe up and clean any spills and/or contaminated equip-
ment using a disinfectant soap.
2. Loosen, but do not remove, the eight bolts (figure 2, item 2) and eight nuts (figure 2, item 3) on the flanged
gate valve (figure 2, item 1) and allow any effluent to drain into the suitable drain pan.
5
2
6
3
4
1
2
Figure 2. Flanged Gate Valve
0027 00-3

