
TM 9-2330-356-14
(b) Loosen
both conduit connectors
cables at batteries. Failure to follow this warn-
ing may create a spark and explosion, result-
ing In serious injury or death to personnel.
(c) Remove two capscrews and nuts that
secure conduit mounting plate to engine mounting frame.
CAUTION
(d) Remove mounting plate and conduit.
Be careful not to crack lens by prying too hard
(2) Installation.
with screwdriver.
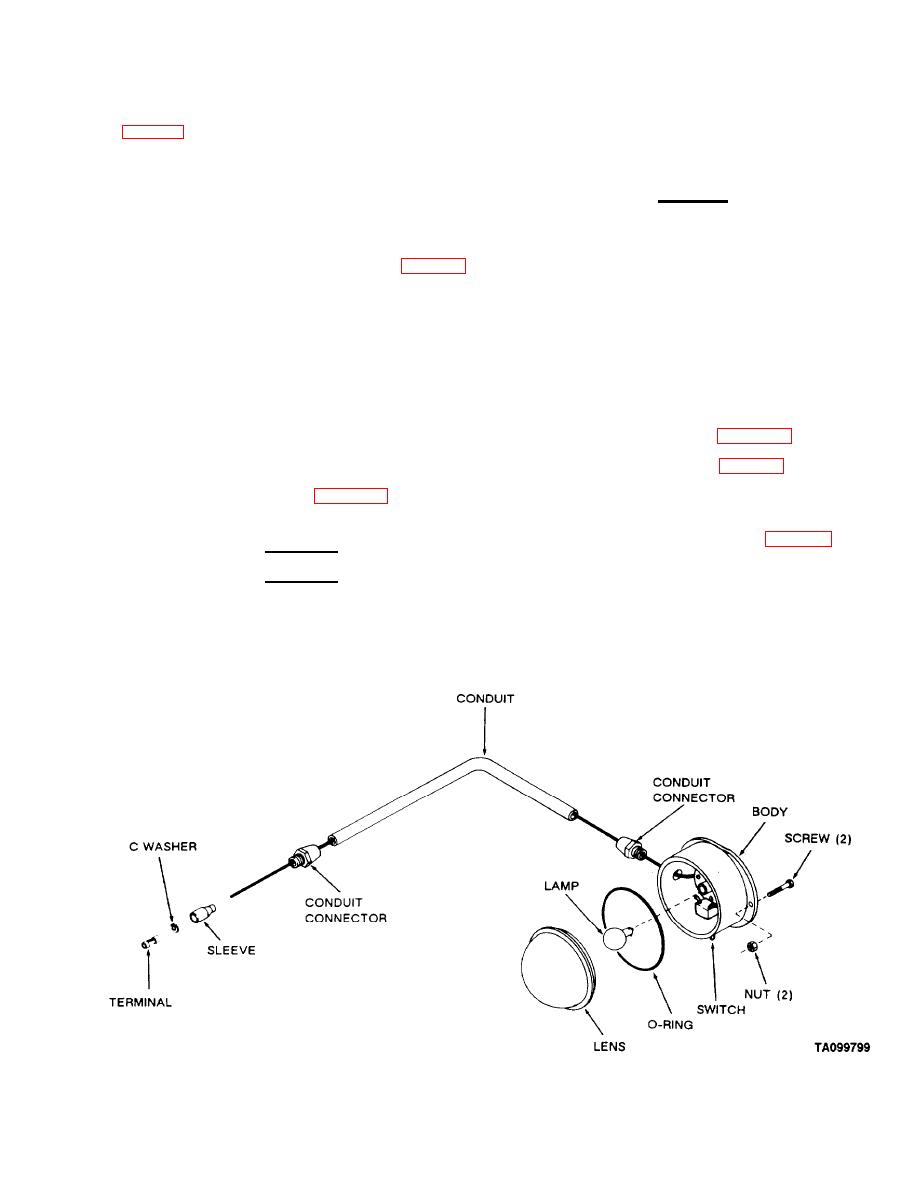
(1) Using a screwdriver, loosen lens from body.
they were removed.
(2) Press down on lamp, and turn to remove
(b) Place end of conduit in conduit
lamp.
connector attached to control panel.
(3) Replace lamp.
(c) Insert other end of conduit into
connector in mounting plate and attach plate to frame
(4) Press lens into light body.
with two capscrews and nuts.
Removal.
b.
(d) Tighten conduit connectors to secure
(1) Open control panel (para 4-24).
conduit in place.
(2) Disconnect terminal (fig. 4-45) from control
(e) Install wiring harness (step b).
panel wiring harness.
Control Panel Light (Fig. 4-45)
(3) Remove terminal from electrical lead.
a.
Replacement of Lamp.
(4) Remove conduit connector (fig. 4-45) from
each end of tubing between control panel and light
WARNING
assembly.
When troubleshooting an electrical malfunc-
(5) Remove two screws and nuts which fasten
tion or performing electrical maintenance,
light assembly to hose trough.
ALWAYS disconnect intervehicular electrical
(6) Remove light and pull wire from conduit.
cable from semitrailer, and negative battery
