
TM 9-3405-206-14 & P
OPERATION (Wear safety glasses to protect eyes)
1. Square off both ends of the band saw blade. Allow for the length
of metal which will be compressed in the weld, so that the original
tooth spacing will he retained.
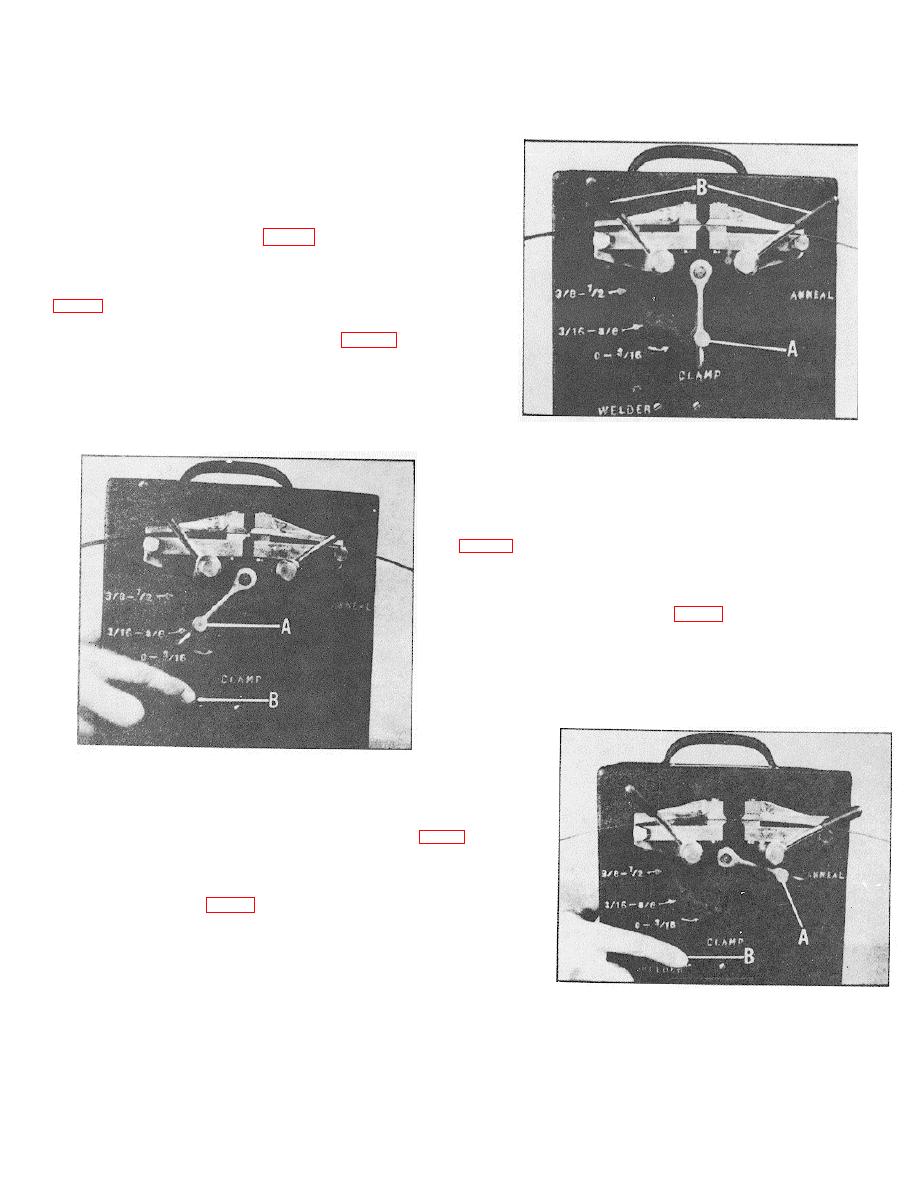
2. Place weld control lever (.A) Fig. 2 in the clamp :Positions Insert
the b)lade ends, one at a time, into the jaws, with one edge of the
blade against the back of the guides. Center the blade ends in the
space between the jaws so the ends just touch each other as shown
3. Clamp the jaws with clamp levers (B) Fig. 2 by swinging the
levers outward and up.
Fig 2.
4. If the jaws are not aligned properly, the jaw alignment screw
(See Fig. 1.) should be used to correct this situation. Turning the
screw to the right raises and to the left lowers the left jaw. A very
slight movement of the screw is sufficient.
5. Move the weld control lever (A) Fig. 3 to the desired width
indicated on the welder. Press welder button (B), and hold in.
The welder will shut off automatically as the weld completes itself.
Fig. 3.
6. Unclamp the blade and move weld control lever (A) Fig. 4 to "anneal"
as shown.
7. Center the weld between the jaws and reclamp the blade. Gently tap
the welder button (B) Fig. 4 until the blade shows dull red. (DO NOT
HOLD THE WELDER BUTTON IN.)
8. Allow the blade to cool. Unclamp jaws and remove the blade.
Fig. 4.
30
