TM 9-3405-215-14&P
Tension should be same as that used for 1/8-inch (3.2
mm) wide carbon saw band. Most accurate filing can be
File Band Storage:
obtained with light band tension.
Clean band with file card. Coil band into no more than
NOTE: Excess band tightening should be avoided.
three loops. Store preferably in a supply cabinet. Here
bands are looped in a 16-inch (405 mm) radius with
Shift machine speed control to "low" gear and "start"
ends hanging in a compartment. (See supply cabinet
drive motor.
sketch in this section).
Filing Operation:
FILE GUIDES
Turn Job Selector dial to "Band Filing" section. Correct
band velocity and feed pressure are listed for many
Standard and long file guide sets are available for the
metals and materials according to work thickness. For
26-inch (660 mm) and 30-inch (760 mm) square tables.
internal filing, release tension, separate band, and run it
Each set has a file guide back-up assembly, plus 1/4-
through workpiece opening. Then reassemble.
inch (6.4 mm), 3/8-inch (9.5 mm), and 1/2-inch (12.5
mm) guides.
Correct speed and pressure combination will produce
curled chips. Best filing speeds are between 80-150 fpm
(24-45 m/min).
BAND POLISHING
Keep files clean. Do not file when teeth are loaded.
Bands are mounted over wheels in same manner as saw
bands.
If your machine is so equipped, a coolant such applied in
light mist form can be used to cool work and clean file
(1)
Remove table center disk. Mount polishing band
during operation.
Filing can be performed without
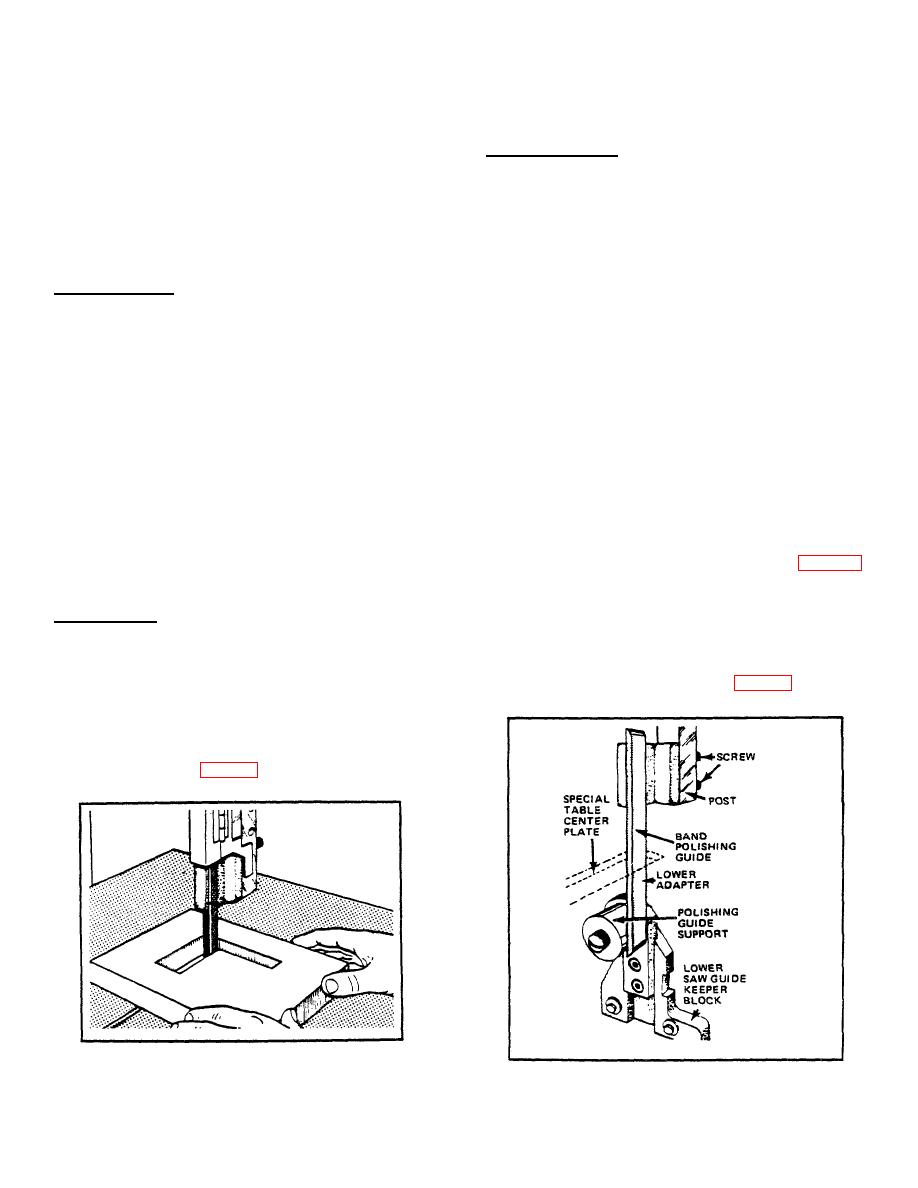
guide support to lower adapter. See Fig. 49.
coolant if there is difficulty in seeing layout lines.
Lower post to 4 inches (100 mm) from table.
Mount polishing band guide to post with two thumb
Internal Filing:
screws.
Mount and track polishing band on
wheels in same manner as file bands. Correct
Release tension, separate band. Hold band at joint with
polishing band tension is that used for a 1/16-inch
both hands (yellow segment in left hand). Bend joint to
(1.5 mm) wide carbon saw band. Install special
approximately 12-inch (305 mm) radius to expose joint
table center adapter plate. See Fig. 50.
slot. Depress yellow band's front end with left forefinger.
Use right thumb and forefinger to disengage dowel.
Slide lock rivet to slot's open end and remove. Run
band through workpiece and join. Apply tension and
check alignment. See Fig. 48.
FIG. 49. BAND POLISHING GUIDES.
FIG. 48. INTERNAL BAND FILING.
25

