TM 9-4120-395-14&P
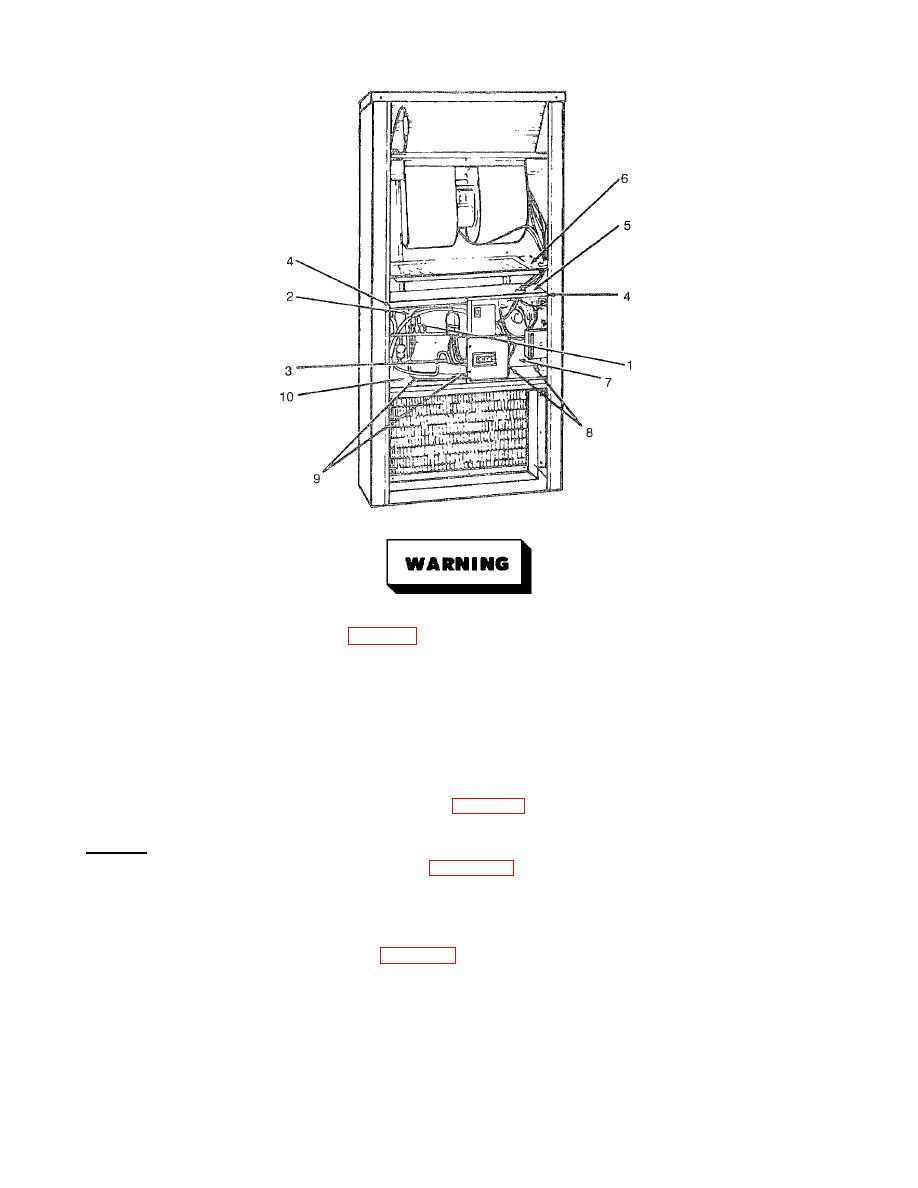
Figure 5-10. Compressor
Avoid getting the refrigerant in the eyes or on the skin.
(6) Discharge the system charge. See para 5-5.
(7) Replace the compressor and correct the system fault that caused the burnout.
NOTE
If the discharge line shows no evidence of sludge and the suction stub is also clean, or perhaps has
some light carbon deposits,
the burnout occurred while the compressor was not rotating.
Contaminants should be largely confined to the compressor housing and a single installation of liquid
and suction line driers will probably suffice to clean up the system. If the sludge is found In the
discharge line (and also found in the suction line) the compressor motor burned out while running
Sludge and acid have been pumped throughout the system and several changes of the driers will
probably be necessary to cleanse the system See para 5-12. Systems suffering running burnouts will
also need the reversing valve replaced. See para 5-19.
b.
Removal.
(1) Unwrap the insulation from the suction line (2, Figure 5-10) so that the joint on the compressor (3) is exposed.
(2) Tag and remove wiring (1) at the compressor (3).
(3) Remove the two screws (4) holding the dividing wall (5).
(4) Lift out filter brackets (6) and lift dividing wall (5).
(5) Remove the control box (7) cover. See para 4-23.
5-37

