
TM 9-2330-373-14 & P
4-42. PINTLE ASSEMBLY (cont)
REMOVAL
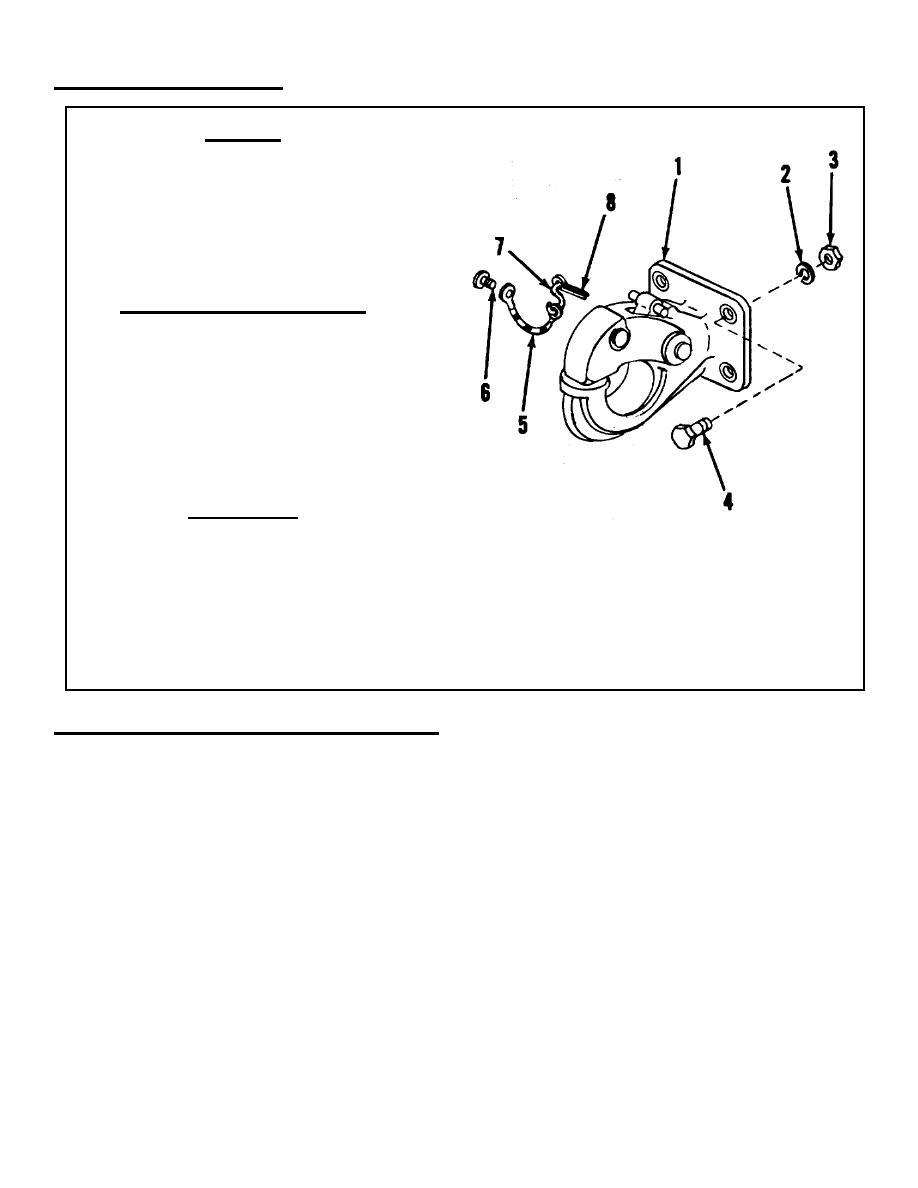
1. Remove four nuts (3), lock washers (2) and
screws (4) securing pintle assembly (1) to
chassis. Remove pintle assembly.
2. Remove cotter pin (8), screw (6) and S-hook (7).
Remove chain (5).
INSPECTION AND REPLACEMENT
1. Inspect pintle for ease of operation.
2. Check for cracked or damaged parts.
3. Replace worn or damaged pintle assembly.
4. Lubricate according to lubrication instructions.
INSTALLATION
1.
Pintle assembly
1. Attach chain (5) to pintle body with S-hook (7),
2.
Washer
cotter pin (8) and screw (6).
3.
Nut
4.
Screw
2. Position pintle assembly (1) and secure with four
5.
Chain
screws (4), lock washers (2) and nuts (3).
6.
Screw
7.
S-hook
8.
Cotter pin
4-43. MAINTENANCE UNDER UNUSUAL CONDITIONS
THIS TASK COVERS
a.
Extreme cold weather maintenance
b.
Extreme hot weather maintenance
c.
Maintenance after fording
d.
Maintenance after operation on unusual terrain
TA 314847
4-127

