
TM 9-2330-356-14
(d) Position control valve, and slide
coupling gaskets over valve ends (para 4-85). Install
(n) Replace plastic plug in needle valve.
(o) Remove gage from underwing nozzle
and stow nozzle.
at A and B.
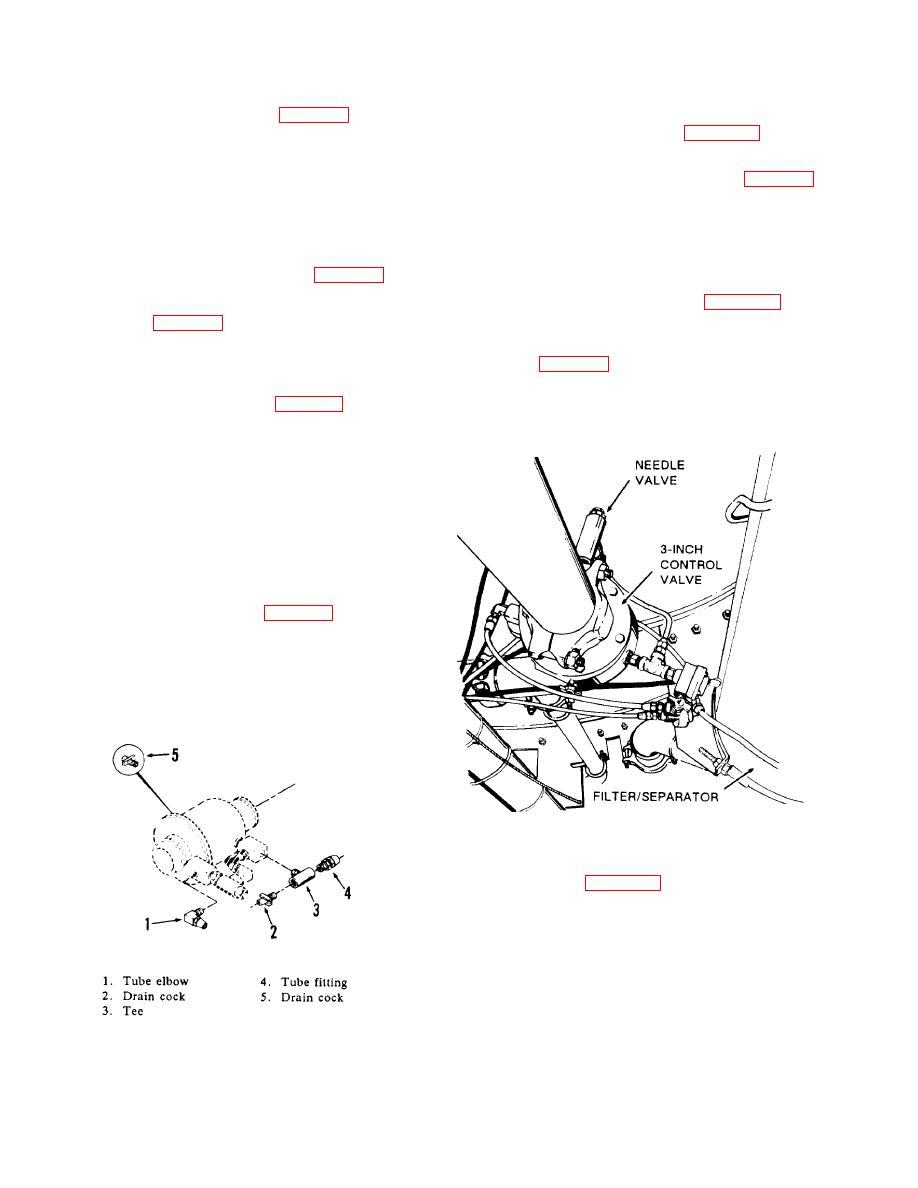
g.
3-inch Control Valve (Deadman Valve) (M970 and
(2) Removal.
M970A1).
(a) Disconnect the two nylon tubes from the
(1) Adjustment.
4-inch control valve at points A and B (fig. 4-135).
(b) Remove the two nuts and bolts from the
remove plastic plug.
two couplings (fig. 4-135) and remove the couplings. Slide
gaskets onto mating pipes and remove the control valve
(b) Using a 4-inch-long screwdriver, close
assembly.
needle valve (fig. 4-134) completely by turning adjusting
screw clockwise.
(c) Place control valve assembly on a clean
surface and remove tube elbow (1, fig. 4-136) from control
(c) When closed, turn adjusting screw five
valve.
turns counterclockwise to adjust valve to proper setting.
(d) Unscrew tee (3) from control valve and
remove tee (3), drain cock (2), and tube fitting (4) as an
assembly.
(e) Unscrew drain cock (5) from control
valve.
(3) Installation.
(a) Remove drain plug from new control
valve and install drain cock (5) (fig. 4-136).
(b) Install drain cock (2), tee (3), and tube
fitting (4) assembly onto control valve.
(c) Install tube elbow (1) onto control valve.
TA099868
(2) Removal (Fig. 4-138).
(a) Disconnect and tag the five nylon tubes
from the control valve at points A through E.
(b) Loosen fitting (1) and elbow (2), and
remove copper tubing (3).
(c) Remove two nuts from each of two
couplings (4 and 5) and remove the couplings.
TA099867
(d) Slide the coupling gaskets onto the
Control Valve.
control valve and remove the control valve assembly.
