TM 9-4110-256-14
5-18.
STRAINER REPLACEMENT.
This task covers:
a. Removal
b. Installation
INITIAL
SETUP
Materials/Parts:
Equipment Conditions:
Self Locking Nut
Refrigeration system discharged (para 5-8).
12, Appendix G
Front bottom doors open.
a.
Removal.
(1)
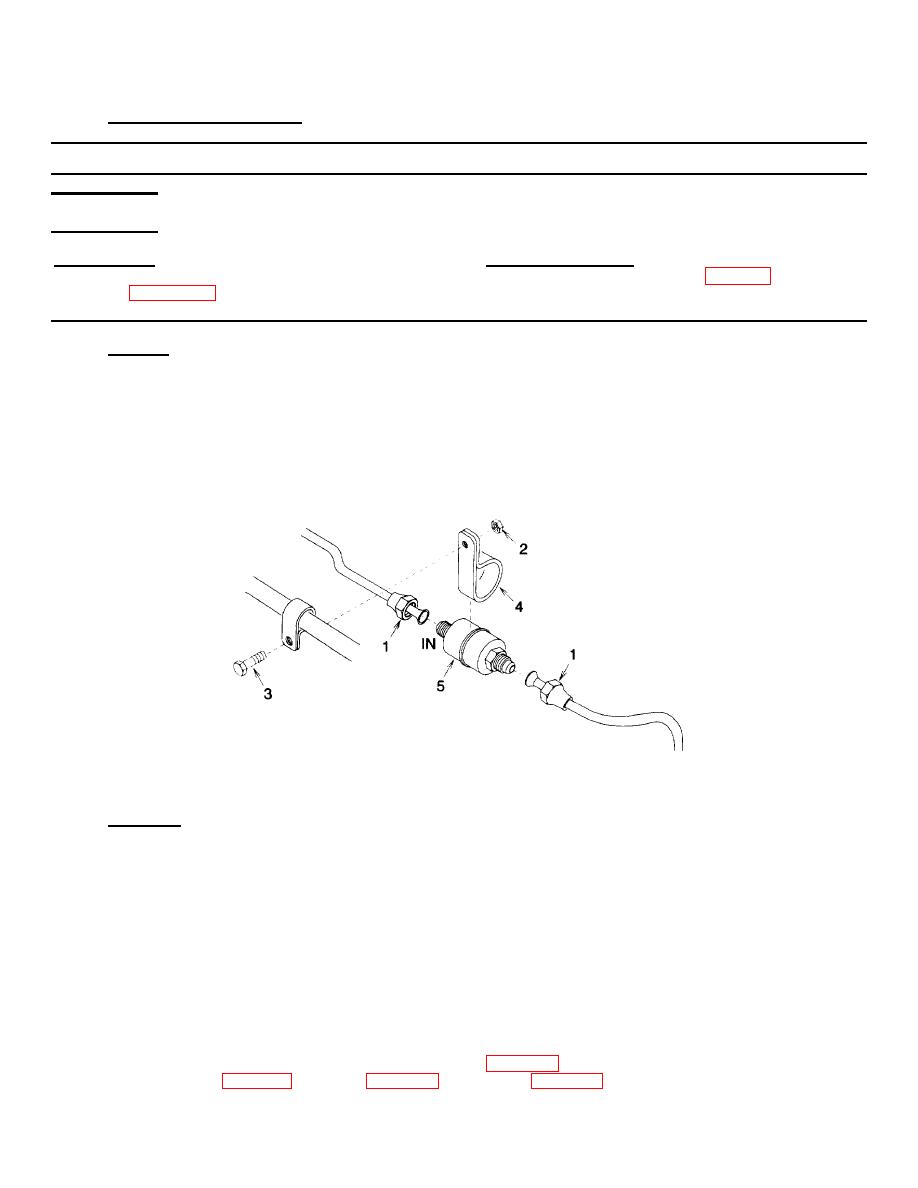
Loosen two flare nuts (1).
NOTE
Note flow direction prior to removal.
(2)
Remove self locking nut (2), bolt (3), clamp (4), and strainer (5). Discard self locking nut.
Figure 5-14. Strainer
b.
Installation.
NOTE
Be sure to observe flow direction noted during removal.
(1)
Install strainer (5), clamp (4), bolt (3), and new self locking nut (2).
(2)
Tighten two flare nuts (1).
NOTE
FOLLOW-ON MAINTENANCE:
Close front bottom doors.
Replace dehydrator (para 5-15).
Leak check (para 5-11), evacuate (para 5-12), and charge (para 5-13) the refrigeration system.
5-38

