
GRINDING with REFACER ATTACHMENTS
ROCKER ARM GRINDING-
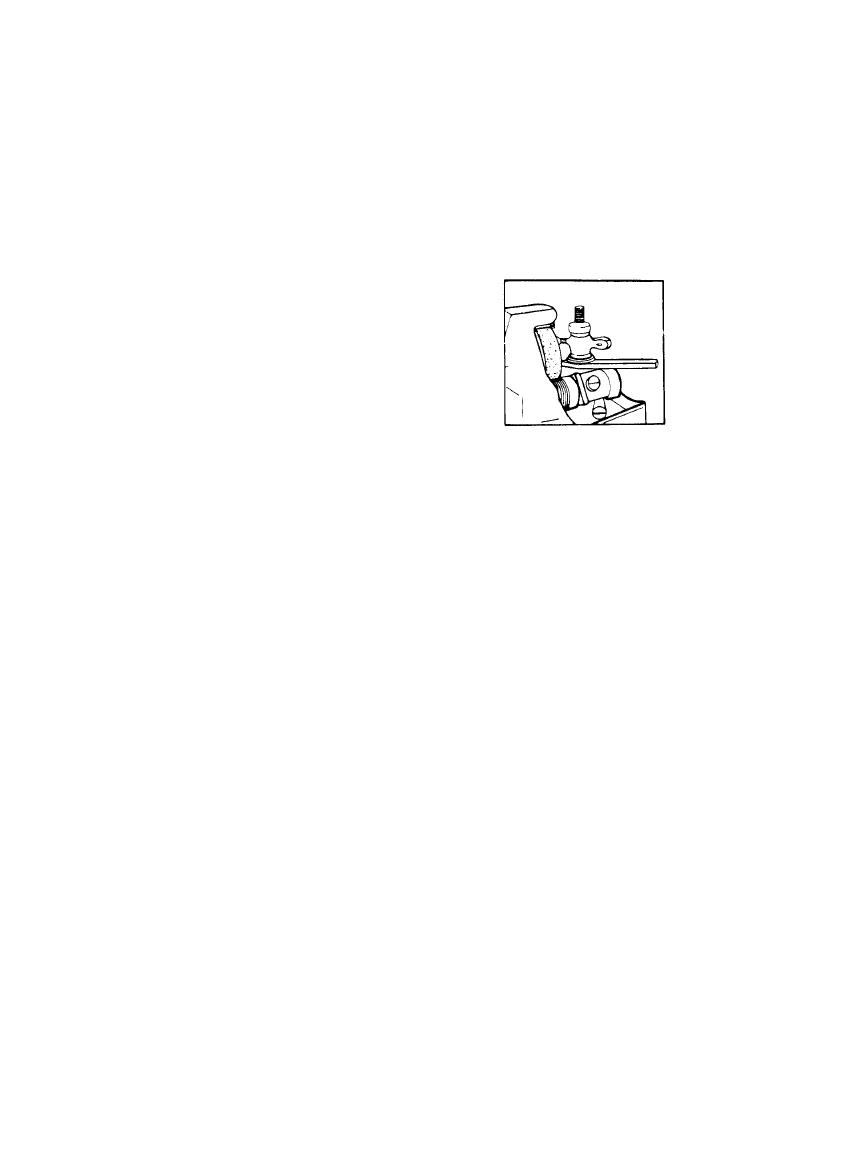
The rocker arm is held firmly between two remov-
able cones. The upper cone may be assembled very
rapidly by aligning the inscribed line with the flat on
the stem of the lower cone. Push upper cone down
until it contacts rocker arm bushing, then turn clock-
wise until rocker arm is clamped firmly between the
cones. The cone and rocker arm assembly drops over
the spindle which slides on the swivel arm. For
wheel dressing, see page 8. For grinding, lock the
attachment bracket in a convenient position by means
of the knurled head aluminum screw.
Locate the cone spindle in position where the full
radius of the rocker arm face is ground by swinging
the swivel arm. Lock the cone spindle in place with
the knurled nut that forms it base. With one hand
swinging the swivel arm, the other hand keeps the
rocker arm in contact with the wheel. Grind lightly and remove only enough
material to restore new face over entire radius.
LUBRICATING the REFACER-
Valve refacer requires a few drops of high grade light oil in the oil cups, which are
located in the work table, wheel housing workhead and under the belt guard. Add oil after
every 50 hours of use, or oftener, depending on usage. In the TYPE T WORKHEAD, oil cups
should be filled with SAE 10 oil after every 30 hours of usage.
REPLACING V-BELT on WHEEL SPINDLE-
The attachment wheel is removed exposing the spindle sheave, this sheave is split and clamped
together by three screws. Remove these three screws and remove one-half of sheave. The
belt then may be removed through the large opening. The new belt can then be slipped into
position and the half of sheave and attachment wheel replaced.
V-BELT ADJUSTMENT for TYPE T WORKHEAD
Remove belt guard by removing three screws #366-10-32x1" lg. Loosen two set screws
#36885 in the large pulley. Adjust the outer pulley flange by the three self-locking screws to
obtain proper belt tension. Replace the belt guard.
ACCESSORIES
Accessories for
valve reconditioning equipment are described in this manual.
WARNING:
The use of any other accessory might
be hazardous.
12
