
b. The exterior skin of the shelter is sus-
c e p t i b l e to puncturing or gouging during the
loading and transportation procedures. Use
Patch Kit, Shelter, Electrical Equipment
( F e d e r a l stock No. 5410-783-6250) to repair
the roof or sides of the shelter as described in
t h e instructions with the patch kit and given
below.
( 1 ) Use emery cloth, sandpaper, a knife,
o r scraper and remove all paint or
foreign matter within a 3-inch radius
around the hole to be patched. Do not
touch the cleaned area with hands or
d i r t y rags.
( 2 ) If the insulation has been gouged
out, fill the hole with clean noncom-
bustible material, if possible. D o n o t
Figure 38.
use the glass cloth for this purpose.
(3) Cut out a piece of glass cloth that
b. Replacement.
will extend 2 inches beyond the edges
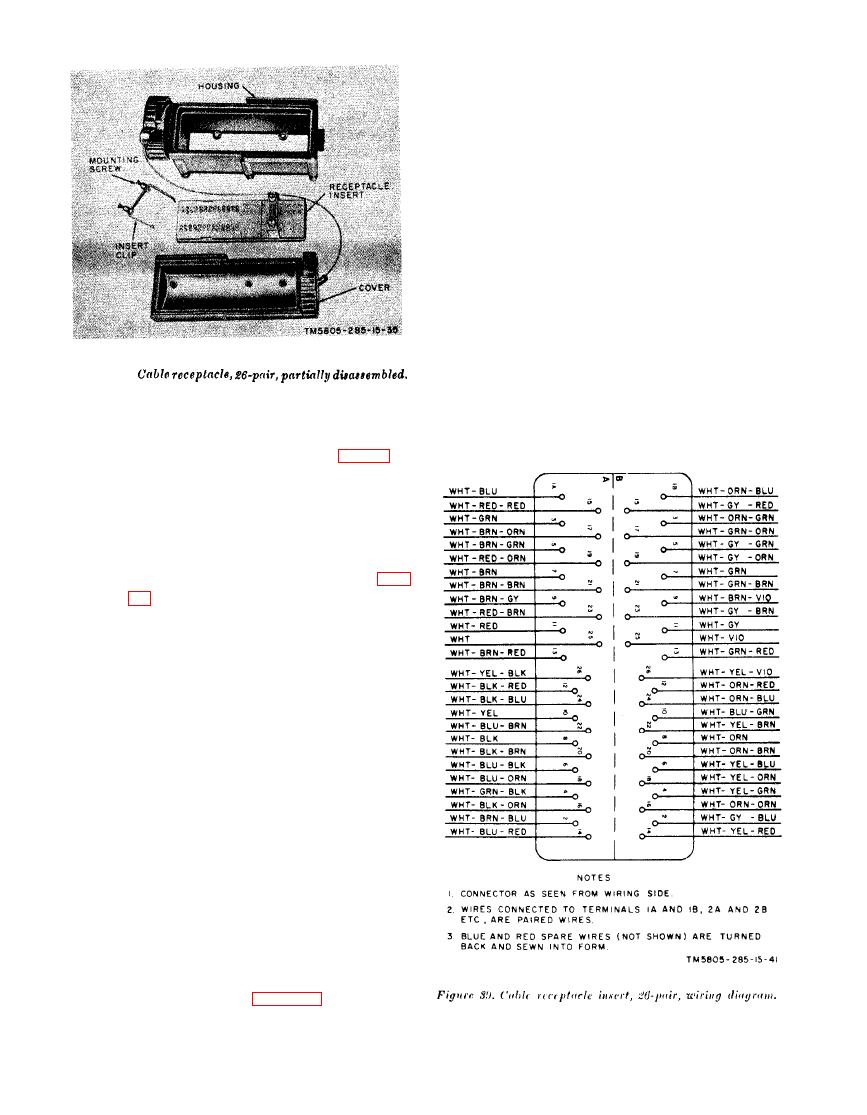
( 1 ) C o n n e c t the cable wires to the re-
of the hole to be repaired.
p l a c e m e n t receptacle insert (fig. 39).
Be extremely careful
Caution:
when connecting and soldering wires.
Excessive heat or pressure will dam-
age the insert.
(2) Carefully place the insert in the 26-
p a i r cable receptacle housing, (fig.
Caution: Be careful not to dam-
age the wires when replacing screws
or when taking up slack in the 26-
pair cable.
(3) Replace the insert clip and tighten
t h e mounting screws (a(2) above).
(4) F a s t e n the cable clip (a(3) above).
(5) Replace the power and signal en-
t r a n c e box panel cover and the 26-
p a i r receptacle cover.
a. T h e m a i n t e n a n c e o r r e p a i r o f t h e S -
1 8 4 / M S C - 3 2 racks, frames, brackets, and as-
s o r t e d hardware is accomplished by removing
a n d replacing screws or bolts. When any ex-
t e r i o r component of the shelter is replaced,
be sure the gasket is adequately sealed to the
shelter to prevent leakage. The responsibilities
for shelter maintenance are listed in the main-
t e n a n c e allocation chart (appx II).
