
TM 9-2330-356-14
(2) Should nozzle be removed, replace nozzle
(3) If necessary, clean outer surfaces of nozzle
cap (1) onto nozzle holder (4) loosely to protect lapped
cap with a brass brush, but do not attempt to scrape carbon
surfaces of nozzle holder.
from nozzle surfaces because severe damage to spring
hole can result.
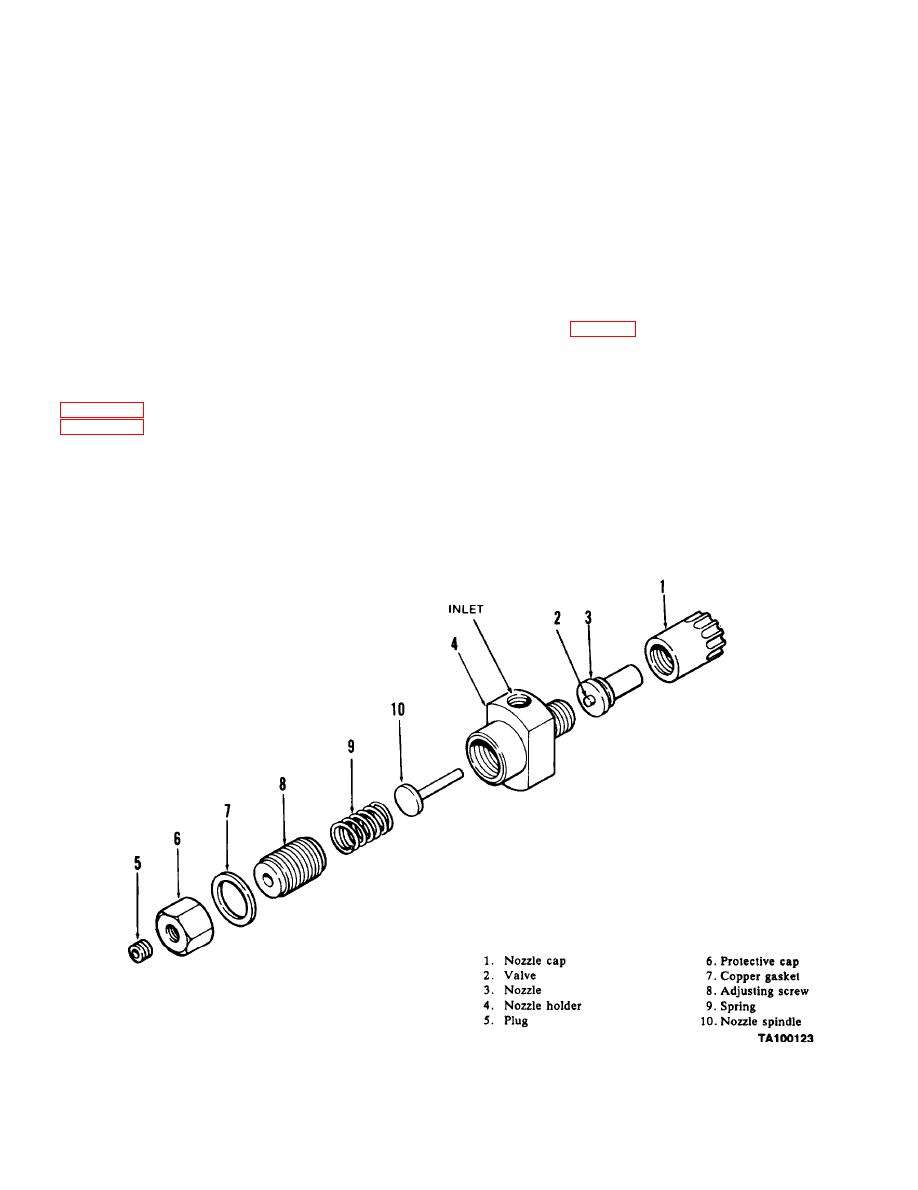
(3) Remove plug (5) from protective cap (6).
(4) Use a soft, oil-soaked cloth to clean nozzle
valve. Clean interior of nozzle cap nut.
(4) Unscrew protective cap (6) from adjusting
screw (8). Remove copper gasket (7).
c.
Inspection. Inspect tappet surfaces of nozzle
holder for nicks or roughening. If damaged, replace nozzle
(5) Unscrew adjusting screw (8) from nozzle
holder.
holder (4). Be careful-adjusting screw is under spring
pressure.
d.
Repair. If cleaning will not eliminate an injector
defect, replace injector.
(6) Remove spring (9) and nozzle spindle (10).
e.
Assembly (Fig. 7-52).
b.
Cleaning.
(1) Secure nozzle holder in a suitable holding
fixture.
(1) Clean fuel injector parts in a clean room on a
clean bench. Provide a pan of clean diesel fuel (item 14,
(2) Install nozzle spindle (10) into nozzle holder
(4).
(3) Install spring (9) into nozzle holder and then
screw adjusting screw (8) into nozzle holder. Do not
(2) Never use hard or sharp tools, emery paper,
tighten.
grinding powder, or abrasives of any kind.
7-46
