TM 9-2330-356-14
4-79. Starter Motor
b. Removal (Fig. 4-124).
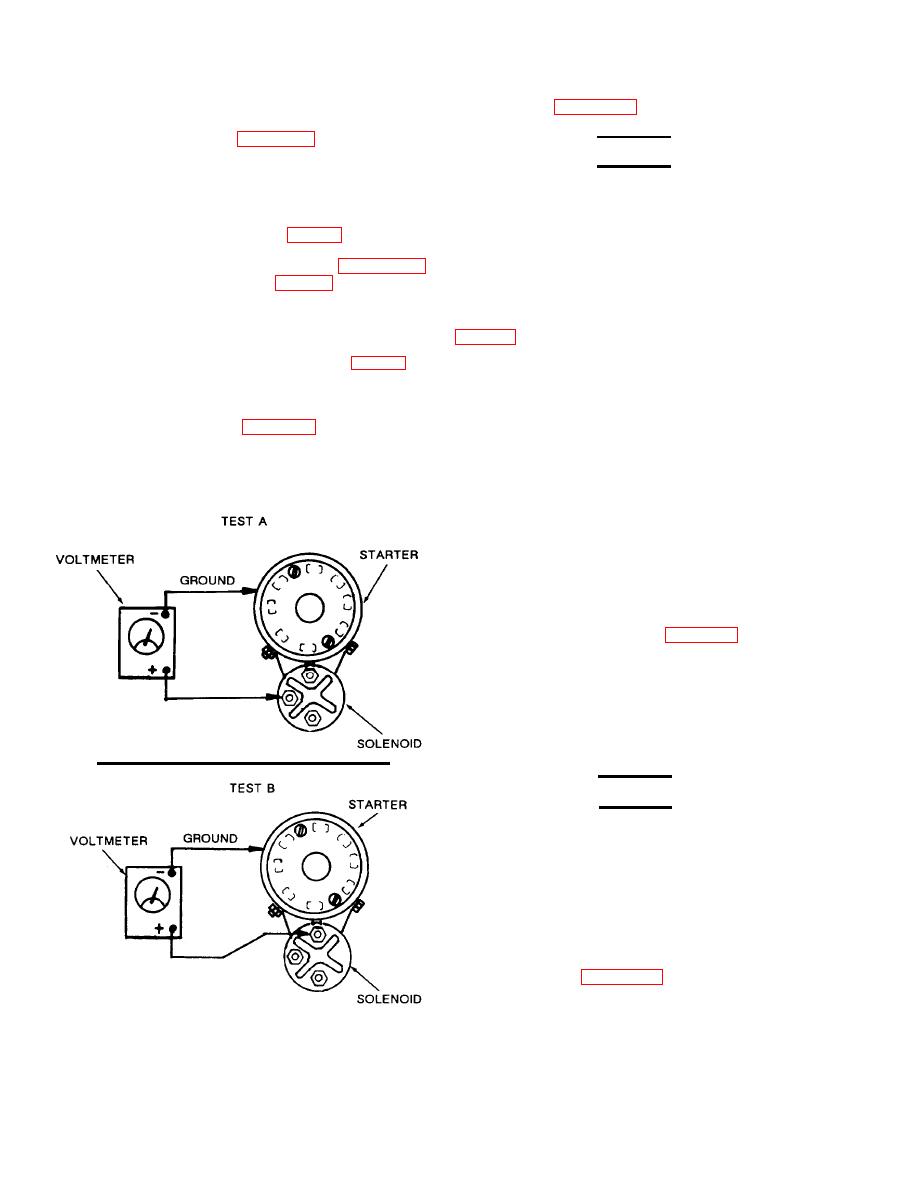
a. Test, On Equipment (Fig. 4-123).
WARNING
(1) Make sure batteries are fully charged and
When performing electrical maintenance,
that all battery and starter cables are serviceable and
ALWAYS disconnect intervehicular electrical
properly installed.
cable from semitrailer, and negative battery
cables at batteries. Failure to follow this
(2) Turn engine switch (2, fig. 2-9) to RUN.
warning may create a spark and explosion,
(3) Connect voltmeter as shown in figure 4-123,
resulting in serious injury or death to
Test A. Turn starter switch (4, fig. 4-9) to START. A
personnel.
voltage reading (12V) indicates circuits leading to starter
are okay.
(1) Remove negative battery cable from battery
(4) Connect a voltmeter as shown in
(2) Starter removal is done from underneath the
START.
vehicle on the left side of the engine.
(a) If no voltage is indicated, solenoid is
(3) Remove starter solenoid protective bracket
defective. Replace solenoid (para 4-80).
(1) by removing two retaining capscrews (2) and washers
(3). Remove five capscrews (4) from engine air shutter.
(b) If voltage is indicated, (12V) but starter
After these screws are removed, the engine air shutter can
does not turn, starter is defective. Replace starter.
be raised to get at top retaining bolt on starter.
(4) Remove hot lead No. 6 from large bottom
pole of solenoid and lead No. 74 from small pole on rear
side of solenoid.
(5) Remove capscrew (5), washer (6), capscrew
(7), external tooth lockwasher (8), and nut (9) from starter
rear support bracket (10). Remove rear starter bracket.
(6) Raise engine shutter (fig. 4-124) so you can
get at top retaining bolt on starter. Remove top capscrew
(11) and washer (12) using a 3/8-inch drive set, long
extension, universal joint, and a 9/16-inch universal
socket. Remove bottom capscrew (13) and washer (14),
then remove starter (15).
c. Installation.
WARNING
When performing electrical maintenance,
ALWAYS disconnect intervehicular electrical
cable on semitrailer, and negative battery
cables at batteries. Failure to follow this
warning may create a spark and explosion,
resulting in serious injury or death to
personnel.
(1) Before installing starter motor, check the
pinion clearance (fig. 4-124). Proper clearance is
important to ensure that starter engages.
TA099853
into full mesh position, then measure the clearance
Figure 4-123. Testing Engine Starter.
between the pinion and pinion stop.


